Thursday, December 31, 2009

Roasted Salmon & Leeks in Phyllo

Growing up, we ate very little fish at home and I detested it. The way I began eating it seems a little backwards - I started with sushi and worked my way to eating cooked fish. When I was a waitress at the Rusty Pelican, I got to try all sorts of fresh fish prepared all sorts of ways and that is probably the single reason I like fish today. After we got married and I decided that I would begin cooking fish at home, I began with salmon. It seemed easy to prepare and easy to tell when it was done. I even remember the first salmon recipe I attempted.

This recipe doesn't have many ingredients, takes only about 20 minutes, but looks really impressive (and tastes great). The only trick is working with the phyllo dough. Last night, I had to throw away a few sheets because they tore as I was trying to peel them off the roll. Oh, and don't forget to take the phyllo out of the freezer in plenty of time. I've made that mistake before. This was as good as I remembered it to be - the salmon was moist, flaky, and the vegetables tasted great with it. My daughter liked eating the "paper."

Roasted Salmon & Leeks in Phyllo (serves 4) originally from Cooking Light May '04

1/2 cup (2-inch) julienne-cut leek
1/2 cup (2-inch) julienne-cut carrot
2 teaspoons minced fresh tarragon
1/2 teaspoon salt, divided
4 (6-ounce) salmon fillets (about 1 inch thick, skin removed)
1/8 teaspoon freshly ground black pepper
12 (18 x 14-inch) sheets frozen phyllo dough, thawed and divided
Cooking spray
2 teaspoons fresh lemon juice, divided
4 lemon wedges

Preheat oven to 400°. Cook leek and carrot in boiling water 1 minute; drain. Combine leek mixture, tarragon, and 1/4 teaspoon salt in a small bowl, tossing gently. Sprinkle salmon evenly with remaining 1/4 teaspoon salt and pepper.

Place 1 phyllo sheet on a large cutting board or work surface (cover the remaining dough to prevent drying); lightly coat with cooking spray. Repeat layers twice, ending with phyllo. Gently press phyllo layers together. Lightly coat top phyllo sheet with cooking spray.

Arrange 1/4 cup leek mixture along center of 1 short edge of phyllo, leaving a 4-inch border; top with 1 fillet. Drizzle with 1/2 teaspoon juice. Fold long edges of phyllo over fish.


Starting at short edge with 4-inch border, roll up jelly-roll fashion. Place wrapped fish, seam side down, on a baking sheet coated with cooking spray. Lightly coat wrapped fish with cooking spray. Repeat procedure with remaining phyllo, cooking spray, leek mixture, salmon, and juice.

Bake at 400° for 15 minutes or until lightly browned, and let stand 5 minutes before serving. Serve with lemon wedges.

Happy New Year!

Tuesday, December 29, 2009

Espresso Cheesecake Brownies


How sad is this: I downloaded photos from my digital camera this morning and I have a picture of these brownies, a couple of the pie I made on Christmas (not blog-worthy), and basically, none of Christmas. I did so bad this year. We do have some great video on the Flip that we got for Christmas but not much else. So, if you're related to me and have Christmas photos and want to share, I'd love to see them!

I've been eyeing this recipe for awhile since it was featured on Tuesdays with Dorie (original recipe from Dorie Greenspan's "Baking: From My Home to Yours"). Yesterday I wanted to make dessert for friends and had all the ingredients for this without having to make another trip to the store.

The cheesecake layer was amazing. I thought the brownie layer was a little dry and not great. Maybe I cooked them too long or maybe the brownie was cooked too much by the cheesecake was cooked through. Even so, the cheesecake flavor dominated and the whole pan was gone quickly.

Espresso Cheesecake Brownies (makes 9)

For the brownies:
1/2 cup flour
1/4 teaspoon baking powder
pinch of salt
5 tablespoons unsalted butter, cut into cubes
4 ounces bittersweet chocolate, chopped
1/3 cup sugar
2 large eggs
1/2 teaspoon vanilla extract

Preheat the oven to 350 F, with a rack in the center. Butter a 9" square baking pan and set aside.

To make the brownies:
Whisk together the first three ingredients. Put the butter and chocolate over a double boiler with water simmering. Stir until the ingredients melt, but don't overheat so that the butter separates. Remove the top of the double boiler and set aside.

Stir the sugar into the chocolate mixture with a whisk, then add the eggs one at a time. Beat well after each egg, then beat in the vanilla. Next, gently stir in the dry ingredients until they disappear. Set aside.

For the cheesecake:
1 1/2 teaspoons instant espresso powder dissolved in 1 tablespoon boiling water
8 ounces cream cheese, at room temperature
2/3 cup sugar
1/2 teaspoon vanilla extract
2 large eggs
1/4 cup sour cream
1 tablespoon flour

Allow the espresso to cool to tepid. With a stand mixer fitted with the paddle, beat the cream cheese on medium until it's completely smooth. Add the sugar and continue to beat for 3 minutes more. Beat in the vanilla and espresso before adding the eggs one at a time. Beat for 1 minute after each egg, then reduce the speed to low and add the sour cream, then the flour. The batter should be smooth.

Pour about 3/4 of the brownie mixture into the prepared pan. Smooth it out, then pour the cheesecake layer over the top, taking care to make it even. Place spoonfuls of the rest of the brownie batter on top, and use a knife to swirl the dark and light batters together. Be careful, however, not to plunge the knife into the base brownie layer. Swirl only as much as necessary.

Bake for around 30 minutes. The brownies should come away from the sides of the pan. The cheesecake will puff and turn lightly browned around the edges. Transfer the pan to a wrack to cool. Once it reaches room temperature, refrigerate for at least 2 hours, until well chilled.

Monday, December 21, 2009

The Most Wonderful Time of the Year


Today is the day! Not Christmas (there are still 3 links on my daughter's paper chain until that day), but the day that we bake. I love Christmas baking - every part of it. Yesterday I made a giant mess of my kitchen making my dough (so it can refrigerate until today) and I loved every minute of that. Today, I headed to my mom's to bake cookies.

We made 4 kinds: The sugar cookies with sprinkles that we've made every year since I can remember (Mary's Sugar Cookies from the Betty Crocker Cooky Book), chocolate crinkles, molasses spice cookies (my favorite and specialty, original recipe from America's Test Kitchen via my friend Eileen), and peppermint shortbread drizzled with dark chocolate (new this year - from the Julienne cookbook).

We made more than I could count at the end and it went smoothly - 2 convection ovens really help! My daughter got up from her nap in time to help decorate:


Sunday, December 20, 2009

Cheater Lasagna


Let me start by saying that I come from a long line of women who made fantastic lasagna. My grandmother and mom make their own sauce from scratch (a meat sauce with ground beef) and boil the noodles and the result is wonderful. So, I have no excuse for not making "real" lasagna. When I discovered the no boil lasagna noodles, I was sold. By combining that with jars of sauce, precooked sausage, and some veggies, I could make a huge pan of homecooked (albeit cheater) lasagna in a short time. It's better than Stouffer's but not as good as Grammy's.

Over the years, I've made many versions of this faker, cheater lasagna with no complaints from the eaters and tonight, I'm taking a pan of it to a Christmas potluck. Usually I make this ahead of time and refrigerate it then throw it in the oven at supper time.

Bec's Cheater Lasagna (makes a 9x13 pan)

Ingredients:

1 package of no boil lasagna noodles (Barilla or Trader Joes)
1 package of fully cooked chicken or turkey sausage, thinly sliced (I'm using TJs basil pesto chicken sausage)
1 16 oz. container of ricotta cheese
4-6 cups shredded mozzarella cheese
1 cup of parmesan cheese
1-2 cups sliced vegetables (I usually use thinly sliced mushrooms and zucchini) optional
2 jars of sauce (I usually use marinara and whatever is on sale. The Vons brand roasted garlic with the whole cloves is great)
2 eggs

In a bowl, mix together the eggs, the ricotta cheese, 1 cup of mozzarella, and 1/2 cup of parmesan cheese. In a 9x13 pan, spread a thin layer of sauce to cover the bottom of the pan. Then, cover the sauce with the lasagna noodles (don't boil them first!). Then, cover the noodles with the ricotta mixture. Next, spread some sausage and veggies to cover the ricotta. Sprinkle with more mozzarella, some parmesan cheese and cover with sauce again. Lay down your next layer of noodles and continue the process. The top of the lasagna should be noodles, sauce, and mozzarella cheese.

Layering Cheat Sheet:
1. Sauce
2. Noodles
3. Ricotta
4. Sausage/veggies
5. Cheese
Repeat from step 1

Bake at 350 for about an hour. I usually cover it for the first 45 minutes or so (spray your foil with baking spray so the cheese doesn't stick to it) and then leave it uncovered. It's done when it's bubbly and golden brown. If it's coming out of the refrigerator, add an extra 15-30 minutes cooking time.

For flair, I sometimes sprinkle the layers with red chili flakes or italian seasoning, or dried basil. If you're feeding vegetarians, skip the sausage and add extra veggies. Or, make Lisa's Vegetarian Lasagna instead.

Wednesday, December 16, 2009

Warm Soup in My Belly


Last week when it was raining and dreary, I made this corn chowder recipe for the second time. I like how it comes together pretty quickly and it's so filling.

I looked up the ingredients in Old Bay seasoning since I didn't have any and just winged it from my spice drawer (about a teaspoon of celery seed, 1/4 tsp paprika, some bay leaves, a dash of cardamom, a dash of clove, some good grinds from a pepper mill). I liked the technique for the potatoes in the beginning - I always thought that soup with potatoes would have to cook much longer for them to be soft and done. One thing I did different from the recipe is that I didn't thaw the corn - I just threw in frozen corn and let it cook a couple of minutes longer.

Here's the recipe.

If you want a different take on corn chowder, try my friend Lisa's recipe.

Monday, December 14, 2009

Gingerbread Houses


Awhile back, I had the idea to invite some of my daughter's friends over (with their moms) to make gingerbread houses. I had looked at this great article or blog post online and thought I had just the perfect way to do it all. Then, I forgot to bookmark and could never find that particular site again. After that, I was completely stressed about giving finals and grading papers and I laid in bed one night planning to call everyone and cancel the party.

But, my good friend the internet saved the day. No, it didn't grade my papers or randomly assign grades to my students, but it did help me find this little video here. I followed this lady's instructions exactly with much success. I also got my papers graded and had a really fun time.

My tips:

1. Watch the video and copy that lady.
2. Use graham crackers, not actual gingerbread (I served real gingerbread on the side)
3. Start a day or two ahead of time by making the houses and letting them dry.
4. Buy meringue powder (Wilton makes it and I found it at Michaels) and follow the directions for Royal Icing.
5. Make a big batch of Royal Icing right when you want to decorate and give each decorator their own ziplock bag filled with icing with a corner cut off - kept the icing from drying out and made decorating the houses easier.
6. Have creative friends with great ideas for what to use to decorate the houses (thanks, Erika!)
7. Resign yourself to the fact that your child will consume way too much sugar


My helper licking frosting off the beaters


The pieces of the houses - 2 days ahead


The assembled houses - morning of the party


The end result!

Saturday, December 12, 2009

Another meatless main dish


Last week, I made two dinners that were total flops. The recipes were tried and true but I was missing major ingredients or I doubled a spice that I shouldn't have . . . it was a mess. Then, I redeemed myself with this dish. I made it once, years ago for a friend who's a vegetarian and sort of forgot about the recipe. This time, I tweaked it quite a bit and I thought it was great.

If you eat a lot of meat, think about making a meatless main dish one night a week. It'll be healthier (vegetarian meals tend to contain more fiber and more vegetable-based nutrients) and better for the environment (see this if you're interested in how making a once-a-week change can make an environmental difference).

You can use any kind of bell pepper here - I prefer yellow but red would look festive this time of year. See the note at the end about blanching the peppers (not necessary, but will yield a more tender result).

Couscous Stuffed peppers (serves 4)

1 cup Israeli cous cous (or regular)
1 T olive oil
1 med. onion, chopped
3 cloves garlic, chopped or 1 tsp. of garlic salt
2 c. fresh spinach
1 c. canned corn, drained
1 c. canned diced tomatoes
2+ T. diced green chiles
1 c. grated lowfat mozzarella
4 bell peppers, cored, stemmed, and seeded

Heat oven to 350 and coat a baking dish with cooking spray. Cook the cous cous in a small saucepan according to package directions (usually 1 3/4 c. veg. broth to 1 c. cous cous) and set aside.

Heat oil in a large pan. Saute onion and garlic until translucent. Add corn, green chiles and tomatoes (with juice) and cook for 5 minutes. Add spinach and cook for 1-2 minutes (don't wilt it too much). Remove from heat and drain the juice (important!). Stir it together with the cous cous and mozzarella. Season with salt and pepper.

Place the peppers upright in the baking dish and fill with stuffing, then top with a little more mozzarella. Bake 20 minutes and serve warm.

Note: With green peppers, I'd recommend after you seed the peppers, putting them in boiling water for 2 minutes and draining them before you fill them. They they'll get softer and be tastier when you eat them.

*I don't know where the original recipe came from - I scribbled it on a piece of paper a long time ago.

Thursday, December 10, 2009

Way too easy


When I read about this recipe on the Food Librarian's blog, she called it "the easiest cake ever" and I have to agree. It takes one bowl, you mix it by hand, and the two times I've made it, it's turned out perfectly.

Last week I made this for my mother-in-law's birthday. My daughter and I had a tea party to celebrate with her and we had a fun afternoon. Since then, my daughter has been wanting to drink tea with me in the afternoons which I've enjoyed.

So, when you need to bake something and didn't plan ahead or don't want to bring ingredients to room temperature, or cream any butter and eggs, try this. The first time I made it, I topped the cake with ripe plums from farmer's market. This time, it was some strawberries. I've also substituted part of the flour with whole wheat.

Easy Cake

Mix in a large bowl:
1 cup all-purpose flour
1 teaspoon baking powder
zest of 1 lemon
3/4 cup sugar
2 eggs
1/2 cup vegetable oil
1 teaspoon almond or vanilla extract (I really prefer the almond flavor)

Pour into greased cake pan. I used a 9" spring form pan but it works well in a 8 or 9inch regular old cake pan. Top with any soft fruit and sprinkle the top with a tablespoon of raw sugar . . .grab a packet from Starbucks if you don't have any :) Bake in an oven preheated to 350 degrees for 20-30 minutes (depending on the size of your pan . . . it took me about 25) or until a toothpick comes out clean and the top is golden brown.

Monday, December 7, 2009

Quinoa


When I attempted to replace white rice, white pasta, potatoes, and other starches in my diet with whole grains, I began experimenting with quinoa (keen-wah). I learned fast that just making it with water (like rice) is not very interesting and found other ways to spice it up. Only recently, did I learn that quinoa is not technically a grain (even though the Incas called it the "Mother Grain") but actually a seed. Quinoa has a higher protein content than any grain (about 16 percent) and the World Health Organization deems it to be as complete of a protein as milk. It is a good source of iron, calcium, folate and many B vitamins.

I have two recent favorite quinoa dishes that are going into regular rotation on my entertaining menus. The first is a side dish that we made for family dinner this summer. I remember that even though we doubled the recipe, it was gone fast. It has layers of flavors so don't skip any of the ingredients!

This weekend, at a holiday party with friends, I served it with grilled filet mignon and an amazing brussel sprout and wild mushroom dish that my friend Kristen made. By the way, even if you don't think you like brussel sprouts, you've got to try this recipe.

Two notes about the recipe: You could probably skip the bell pepper part at the beginning and use already roasted red peppers in a jar. It would make a great vegetarian main dish and Cooking Light suggests adding a can of chickpeas if you're going to serve it as a main dish. I followed the recipe to a tee and loved every bite!


Quinoa with Moroccan Pesto (6 side dish servings) Cooking Light 7/09

1 red bell pepper
1 cup uncooked quinoa
1 cup fat-free, less-sodium chicken broth
1/2 cup water
1/2 cup fresh orange juice
1/3 cup coarsely chopped fresh cilantro
1/4 cup extra-virgin olive oil
2 tablespoons coarsely chopped fresh flat-leaf parsley
3 tablespoons fresh lemon juice
1/2 teaspoon ground cumin
1/4 teaspoon kosher salt
1/4 teaspoon ground red pepper
2 large garlic cloves, coarsely chopped
12 oil-cured olives, pitted and chopped
1/4 cup chopped pistachios

Preheat broiler. Cut the red bell pepper in half lengthwise and discard the seeds and membranes. Place pepper halves, skin sides up, on a foil-lined baking sheet; flatten with hand. Broil 12 minutes or until blackened. Place in a zip-top plastic bag; seal. Let stand for 10 minutes. Peel and chop.

Combine quinoa, broth, 1/2 cup water, and juice in a large saucepan; bring to a boil. Cover, reduce heat, and simmer 12 minutes or until liquid is absorbed.

Place cilantro and next 7 ingredients (through garlic) in a food processor (I used a mini chopper & you could probably also use a blender) process until smooth. Combine bell pepper, quinoa mixture, cilantro mixture, and olives in a large bowl. Sprinkle with pistachios.


On to the second recipe . . . I was looking for something else and stumbled across this. I've had great success the two times that I've made it. Once, I served it as a main dish and used pasilla chiles and once I served it as a side dish and used anaheim chiles. The original calls for poblanos which I rarely see. You'll need two pepper halves per person if you're doing this as a main dish.

Quinoa-stuffed Chiles (4 main dish servings, 8 side dish servings) Cooking Light 7/96

4 (5-inch) poblano chiles (or pasilla or anaheim)
1 1/2 cups water
3/4 cup uncooked quinoa
1/2 cup chopped green bell pepper
1/2 cup chopped red bell pepper
1/2 cup chopped onion
2 T diced green chiles (from a can or you could use a few teaspoons of fresh diced jalapeno instead)
2 garlic cloves, minced
1/2 cup minced green onions
1 tablespoon minced fresh or 1 teaspoon dried cilantro
1 tablespoon low-sodium soy sauce
1 tablespoon lime juice
2 cups tomato juice (I used spicy V8)
1 cup shredded cheddar cheese

Preheat oven to 350°. Cut chiles in half lengthwise; remove stems and seeds. Set aside. Combine water and quinoa in a medium saucepan; bring to a boil. Cover, reduce heat, and simmer 13 minutes or until liquid is absorbed. Set aside.

Spray a large nonstick skillet with cooking spray; place over medium-high heat until hot. Add bell peppers, onion, green chiles or jalapeño pepper, and garlic; sauté 3-4 minutes. Remove from heat; stir in quinoa, green onions, cilantro, soy sauce, and lime juice. Spoon 1/3 cup quinoa mixture into each chile half.

Pour tomato juice into a 13 x 9-inch baking dish; place stuffed chiles in dish. Cover and bake at 350° for 20 minutes. Sprinkle cheese over chiles; bake, uncovered, an additional 10 minutes or until cheese melts and chiles are thoroughly heated. Spoon tomato juice over chiles.

Saturday, December 5, 2009

Chocolate Cinnamon Bundt Cake


What better way to embrace December than with decadent baked goods? I love the holidays and my daughter helped me decorate for Christmas this week. She loved all the nativities that we have and went to the kitchen to find raisins to feed baby Jesus. She's got it figured out that part of the holiday spirit is feeding people you love! I have a few favorite cakes that I'll post - they're all simple, tasty, and would make a nice addition to a holiday meal, open house, or afternoon with friends.

This is a Chocolate Cinnamon Bundt Cake. Need I say more? Ok, I'll tell you about the espresso glaze . . . it's to die for. When I made this, my husband told me that I should pour it over anything that I bake because all he wanted was the glaze. I had the ingredients for this in my kitchen and I've fallen in love with baking sprays that have flour in them (PAM makes one) for bundt cake success.

Chocolate Cinnamon Bundt Cake (from Bon Appetit 9/09)

1 cup boiling water
1/2 cup natural unsweetened cocoa powder
4 teaspoons instant espresso powder, divided
2 cups unbleached all purpose flour
2 teaspoons baking powder
2 teaspoons ground cinnamon
1 teaspoon salt
2 1/2 cups (packed) golden brown sugar, divided
1 cup vegetable oil
1 tablespoon vanilla extract
2 large eggs
1 1/4 cups mini semisweet chocolate chips, divided
1/4 cup (1/2 stick) unsalted butter, room temperature

Preheat oven to 350°F. Generously grease a 12-to 15-cup nonstick Bundt pan. Whisk 1 cup boiling water, cocoa powder, and 2 teaspoons espresso powder in 2-cup glass measure. Whisk 2 cups flour, baking powder, cinnamon, and salt in medium bowl. Using electric mixer, beat 2 cups brown sugar, 1 cup vegetable oil, and 1 tablespoon vanilla in large bowl to blend. Add eggs; beat to blend.

Beat mixture until smooth, about 30 seconds longer. Beat in half of flour mixture, then cocoa mixture. Add remaining flour mixture; beat to blend. Fold in 1 cup chocolate chips. Transfer batter to prepared Bundt pan.

Bake cake until tester inserted near center comes out clean, about 50 minutes. Cool the cake 10 minutes. Invert cake onto rack (or platter) and cool 15 minutes longer.

Meanwhile, stir remaining 1/2 cup brown sugar, 2 teaspoons espresso powder, and 2 tablespoons water in small saucepan over medium heat until sugar melts. Remove from heat. Add butter and remaining 1/4 cup chocolate chips; stir until butter and chocolate melt. Cool slightly. Using spoon, drizzle icing over cake. Cool cake completely, slice, and serve.

PS - I'm back from my blogging hiatus . . . it wasn't planned but with a trip to the east coast for Thanksgiving and trying to grade essays, quizzes, and homework before finals next week, things have been busy! Looking forward to catching up with everyone in the next few weeks.

Wednesday, November 18, 2009

Gingerbread Cupcakes


I don't have much to post about Thanksgiving because this year we are so blessed to be guests in my cousin's home in Connecticut for the holiday. I have never hosted a Thanksgiving dinner (read: made a turkey by myself) and I hope that some year soon I can do that in our new home!

Even though I've not had full responsibility for the holiday, I do love making Thanksgiving dishes and I thought I'd share a few ideas with you.

If you need a new stuffing idea, try this. I've had great success with it in past years and made a few changes. I leave out the ham and hazelnuts and use dried cranberries in place of the dried cherries. My colleague at work makes it just as is and loves it.

If you want to try a twist on a pecan pie, this one is also really good. I also like this pumpkin pie variation which has swirls of pumpkin pie filling in a gingerbread "crust."

If you want to skip the pies, and make cupcakes, try the cupcakes I made last night. My friend Katy was in town from Texas and came over for dinner and we made these gingerbread cupcakes with lemon cream cheese frosting. They were delicious - the texture reminded me a lot of the Martha Stewart Zucchini Spice Cupcakes that I love so much. The little bit of lemon in the frosting is a great complement to the gingerbead spices. If you want a different topping option, try lemon curd or a powdered sugar icing made with lemon juice.

Gingerbread Cupcakes (makes 18) - Martha Stewart's recipe

2 teaspoons baking soda
2 1/2 cups all-purpose flour
2 teaspoons ground ginger
1 1/2 teaspoons ground cinnamon
1/2 teaspoon ground cloves
1/2 teaspoon ground nutmeg
1/2 teaspoon salt
2 teaspoons baking powder
8 tablespoons (1 stick) unsalted butter, room temperature
2/3 cup packed dark-brown sugar
1 cup unsulphered molasses
2 large eggs, room temperature, lightly beaten

Heat oven to 350 degrees. Line muffin tins with paper baking cups, and set aside. In a small saucepan, bring 1 cup water to a boil. In a bowl, combine boiling water and baking soda; set aside. In a large bowl, sift together flour, ground spices, salt, and baking powder; set aside.

In an electric mixer fitted with the paddle attachment, cream the butter until light. Beat in the brown sugar until fluffy, 1 to 2 minutes. Beat in the molasses, baking-soda mixture, and flour mixture. Beat in the eggs.

Fill the cupcake papers three-quarters full, making sure that the batter is divided evenly. Bake cupcakes until a toothpick inserted in the center of them comes out clean, about 30 minutes. Let cupcakes cool a few minutes, then transfer to a wire rack to cool completely before frosting.

Lemon Cream Cheese Frosting (frosts 24 cupcakes)

8 oz cream cheese, softened
1 stick butter, softened
1/2 - 3/4 c. powdered sugar
1 tsp lemon extract (optional)

Use an electric mixer to beat all ingredients together until fluffy.

Sunday, November 15, 2009

Fondue-ish


Recently, I heard Terry Gross interviewing Ruth Reichl on Fresh Air. Terry asked Ruth what fall recipes are her favorite and she described this Roast Pumpkin with Cheese "Fondue" from the November 08 issue of Gourmet. You layer toasted bread, two kinds of Swiss cheese (Gruyere and Emmantal) and a mixture of cream, broth, and nutmeg inside the pumpkin and then bake the whole thing for an hour or so. Terri asked, "Is it a soup?" but I don't remember exactly what Ruth said.

When writing the title of this recipe, Gourmet puts fondue in quotation marks and I had been calling it fondue until my mom asked me what actually makes something a fondue.

Being Swiss, I thought I owed you a thorough definition of fondue: Fondue originated in Switzerland in the 18th century and the term is used to describe the communal eating process of dipping something in a pot of hot cheese, oil, or broth. Traditional Swiss fondue was a combination of "at least two varieties of cheeses that are melted with wine and a bit of flour and served communally out of pot called a 'caquelon.' Long forks are used by each guest to spear a cube of bread then the bread is dipped into the cheese and eaten" (www.gourmetsleuth.com).

Now, because there are already layers of bread in the pumpkin, you don't really sit around and dip into it with forks like real fondue. It can be eaten as a vegetarian main course or, like we did last night, as an appetizer. I served it with more bread on the side and slices of green apple. You scrape the cooked pumpkin flesh with a spoonful of the melty cheesy goodness and it tastes divine!

Next time, I might try some white wine in place of the broth and a little kirsch for a more traditional fondue flavor (although this is close) and it could definitely use more salt.

Roast Pumpkin with Cheese "Fondue"  (8 main course servings)
from Gourmet 11/08

1 (15 inch) baguette, cut into 1/2 inch slices
1 orange pumpkin (about 7 pounds)
1.5 cups heavy cream
1 cup reduced sodium vegetable or chicken broth
1/2 tsp. grated nutmeg
2.5 cups coarsely grated Gruyere (6oz)
2.5 cups coarsely grated Emmental (6oz)
1 T olive oil
salt & pepper

Preheat oven to 450 and position rack in lower third of the oven.  Toast baguette slices in a single layer on a cookie sheet until tops are crisp (bread will still be pale), about 7 minutes.  Transfer to a rack and cool.

Remove the top of the pumpkin by cutting a circle (about 3 inches in diameter) with a small sharp knife.  Remove any seeds and fibers from the inside of the pumpkin (including the lid) with a spoon.  Season the inside with 1/2 teaspoon of salt.

In a bowl, whisk together the cream, broth, nutmeg, 1 teaspoon salt, 1/2 teaspoon pepper.  Combine cheeses together in a separate bowl.

Put a layer of toasted bread in the bottom of the pumpkin.  Top with 1 cup cheese and 1/2 cup cream  mixture.  Continue layering (bread, cheese, cream) until the pumpkin is filled from about a 1/2 inch from the top, using all of the cream mixture (you may have bread & cheese left over).

Cover pumpkin with the top and put in an oiled small roasting pan.  Brush the pumpkin all over with olive oil.  Bake until pumpkin is tender and filling is puffed, about 1.25 -1.5 hours.

Friday, November 13, 2009

Greens

Here's what I did with the greens in my CSA box (honestly, I'm not good at identifying all of them but I think they were chard, collard, and maybe mustard greens).

Southern Comfort Soup- serves 6
(from "How to Pick a Peach" by Russ Parsons)

Ingredients

1 1/2 cups water
3/4 cup jasmine rice
2 tablespoons olive oil
4 garlic cloves, minced
1/2 pound mixed leafy greens without stems (mustard, kale, collard, beet. turnip and chard)
6 cups weak vegetable or chicken broth
Salt
1 1/2 teaspoons sherry vinegar, plus more to taste
Freshly ground pepper
Freshly grated Parmigiano-Reggiano

1. Heat the water and rice in a 1-quart saucepan over medium-high heat. When the water comes to a boil, reduce the heat to low and cover tightly. Cook until the bottom of the pan is dry and the rice is tender, about 15 minutes. Remove from the heat and let cool, covered, until ready to use.

2. Meanwhile, heat the olive oil and garlic in a soup pot over medium-high heat until the garlic softens. Coarsely chop the greens and add them to the pot. They will come close to overfilling, but within about 5 minutes of cooking and stirring they will wilt down to almost nothing. Add the broth and 2 teaspoons salt and slowly bring to a simmer.

3. When the greens come to a simmer, cook until the colors begin to darken and fade, 5 minutes or less. Transfer the greens and liquid to a food processor or blender (or use your hand immersion blender) and puree until the greens are finely minced.

4. Return the puree to the pot and bring back to a simmer, then stir in the rice and vinegar. Season with a generous grinding of pepper. Taste for salt and vinegar.

5. Ladle the soup into heated shallow bowls and garnish with a generous grating of cheese. Serve.

Thursday, November 12, 2009

CSA


CSA (n.): Community sponsored agriculture. A way to buy local, seasonal produce directly from a farmer.

My sister Theresa has been singing the praises of CSAs to me for awhile now and I finally signed myself up and received my first box of produce. I used to order from an online service called Organic Express (now Spuds) and enjoyed getting a mixed box of seasonal fruit and vegetables but the idea of supporting local agriculture is even more attractive to me.

If you live in the LA (Pasadena) area, check out the South Central Farmers' Cooperative. I see signs at my local Whole Foods that some of their locally grown vegetables come from this group. While the actual South Central Farm was bulldozed in 2006, the CSA is run from South Central and the produce is grown in Bakersfield. You can a buy a CSA box for only $15 and there are several pick up options (I picked mine up from Knox Presbyterian on Hill and Del Mar in Pasadena).

I'm excited to try some new things. Like purple beans - no joke. Hopefully I'll have some new recipes based on my box o' fun for you soon.

Tuesday, November 10, 2009

Are you tired of pumpkin yet?


Because I'm not! But, I'm moving on to my next favorite seasonal flavor - gingerbread. My Grandma Vi used to send us big, soft gingerbread people at Christmas time that she made herself and decorated with raisin eyes and m&m buttons. By now you know that I'm not to be trusted with cookies that you roll out, cut, and decorate but I love all things gingerbread and I have a bunch of other gingerbread recipes ready to go. I'm trying to pace myself because I'm working out as much as I possibly can and tonight, I was in a baking mood after a long day at work. And, let's face it: If there are candy canes on the lamp posts of Monrovia and gingerbread lattes at Starbucks, it's time to get baking!

My decision to make this particular recipe started with some sour cream that I needed to use up. I was looking up chocolate sour cream cake recipes when I thought of gingerbread. I can't remember making a gingerbread recipe with sour cream before and I liked the looks of this one. I got my dry ingredients all measured out, had my eggs room temperature and when I pulled out my molasses, I only had a little more than 1/4 cup, not the 1/2 cup the recipe calls for. I added a little extra brown sugar (remember, it's just white sugar and molasses) to compensate. I also substituted 1/2 cup of the flour with whole wheat.

Happy Gingerbread Season to you!

Here's the recipe I used.

PS: If I were going to make a gingerbread house this year, it would look like this one in honor of the mid-century modern house that we're in the process of purchasing. Stay tuned for details!

Friday, November 6, 2009

Pumpkin Cookies


I've literally made 8 dozen of these cookies in the last week. Theresa mailed me an index card with this recipe on it when she lived in Texas and I think it was originally from Joy of Cooking. While the original recipe is pretty perfect, I still modified it quite a bit the second time around (not because the first batch wasn't good but because we were eating way too many) so I'll post both versions.

If you're lucky enough to have some canned pumpkin (and you're not sick of it yet), these are great.

Pumpkin Cookies (3-4 dozen)

2 cups all purpose flour
1 teaspoon baking powder
1/2 teaspoon baking soda
1 teaspoon ground cinnamon
1/2 teaspoon allspice
1/2 teaspoon salt
1 stick (1/2 cup) butter, room temperature
1 large egg, room temperature
1 cup sugar
1/2 cup applesauce
1 teaspoon pure vanilla extract
1 cup canned pumpkin puree
1/2 c. chopped nuts (I used pecans)
1/2 c. raisins
1/2 c. chocolate chips (didn't use them this time around)

Preheat the oven to 350 degrees. Combine the dry ingredients (flour through salt). In a large bowl, cream the butter for a minute. Add the sugar and beat until pale and fluffy. Add the egg, applesauce and vanilla. Add the pumpkin. Add the dry ingredients and mix until combined. Stir in nuts, raisins, and chocolate chips. Bake at 350 for 12-15 minutes.

Bec's Version of Pumpkin Cookies (3-4 dozen)

1 cup all purpose flour
1 cup whole wheat flour
1 T. flax seed
1 teaspoon baking powder
1/2 teaspoon baking soda
1 teaspoon ground cinnamon
1/2 teaspoon allspice
1/2 teaspoon salt
1/2 stick (1/4 cup) butter, room temperature
1/4 cup vegetable oil
1 large egg, room temperature
1/2 cup sugar
1/4 cup agave
1/2 cup applesauce
1 teaspoon pure vanilla extract
1 cup canned pumpkin puree
1/2 c. chopped nuts (I used pecans)
1/2 c. raisins

Preheat the oven to 350 degrees. Combine the dry ingredients (flour through salt). Stir together the pumpkin, applesauce, and agave. In a large bowl, cream the butter for a minute. Add the sugar and beat until pale and fluffy. Add the egg, vanilla, and pumpkin mixture. Add the dry ingredients and mix until combined. Stir in nuts and raisins. Bake at 350 for 12-15 minutes.

Thursday, November 5, 2009

Unexpected nice things

Challenge: Don't focus on the things that don't go my way and look for the nice surprises in life.

1. Starbucks has their holiday flavors and I had an amazing gingerbread latte this morning.
2. My colleague built a podium for me out of a cardboard box (my students have debates and my classroom has no podium or lectern)
3. A friend made an unexpected trip to So Cal from Indiana and I get to meet her new baby on Monday
4. A friend who has had a bunch of painful dental work done is babysitting tonight so we can go on a date
5. Today is the fifth day in a row that I'm able to work out - a luxury with a 2 year old!

What happened to you today?

Wednesday, November 4, 2009

Sin Hongos


On Sunday night, I made a dinner was a big departure from the "old me." The one who hated mushrooms, made fun of siblings who liked them, told little cousins that they were fungus like athlete's foot, and learned to order everything at restaurants without them. But, I've turned over a new leaf.

While love might be a strong word, I have learned to like mushrooms and after seeing this recipe for Mushroom Bisque with Crispy Shallots last week, I really wanted to give it a try.

End result: Forgot to make the crispy shallots which I think would have added a lot to the dish. I didn't like the mushrooms in such big chunks (my favorite chunks were the sauteed onions) and next time I would add some spice (rosemary?). If you're a mushroom person, it's a good recipe and it only took about 20-30 minutes to make. If you're a vegetarian, try mushroom broth in place of the beef broth and maybe add a little dark beer or more sherry.

Monday, November 2, 2009

Persimmons


Until today, I had never tasted a persimmon. Boy, was I missing out. Steve's dad has a Fuyu persimmon tree in his front yard and says that he counted last year and he picked 4,000 persimmons. The other day, they gave me a bunch of them and I was intrigued. I ate one of them raw, sliced another into a salad with watercress and goat cheese, and then made a batch of persimmon preserves.

I adapted this recipe for pear butter from Simply Recipes. I had a few less persimmons so I used less sugar (and a little agave) and I used some anise seeds in a tea strainer instead of star anise. I don't have a food mill or chinois but because I peeled the persimmons first, I just blended the mixture with my hand blender before adding the sugar.

The end result was good - definitely more of a persimmon butter than a jam and while not chunky, the flavors tasted sort of like a chutney to me. I like ginger a lot and that's the flavor that dominates but next time I'd probably reduce the ginger a little bit.

Stephanie is working on some persimmon desserts so maybe she'll share her recipes on the blog when she finds one she likes!

Thanks to Steve, Steph & Nono for the persimmons. Thanks to Elise for the recipe.

Friday, October 30, 2009

And more pumpkin . . .


This week, I made pumpkin pancakes (so-so . . . should have followed a recipe) and a pumpkin buttermilk bundt cake (barely lasted long enough to take photos of). And, it's not enough - I'm planning on making the pumpkin cookies from Joy of Cooking tonight or tomorrow. I've been using canned solid pack pumpkin, not the innards of our jack-o-lanterns and have amassed a nice little stash from Trader Joe's and Whole Foods where it seems to be in abundance on the shelves.

The Food Librarian inspired the bundt cake - she's making a bundt cake every day for 30 days and I've been following her quest closely. The recipe is here on Epicurious (Gourmet 11/05) and I followed it exactly except I added a dash of cinnamon to the icing. I haven't made a bundt since this disaster and I used the Pam spray for baking with flour in it - why didn't I discover this sooner?? Next to my silpat mats, it's going to be my best baking secret.

Have a fun, safe Halloween! And, happy birthday Stephanie!

P.S. If you want someone else to make you pumpkin pancakes, try them at Dish in La Canada - delicious.

Friday, October 23, 2009

First course


I know that asparagus is in season in late spring but come on, if you live in Pasadena, doesn't it feel like spring? I proposed a cream of garlic soup for a dinner party I had last week but my husband thought that the after affects of smelly garlic seeping out of our pores for the next 48 hours might not be pleasant.

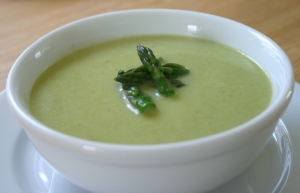
I made this soup and everyone loved it. I've made asparagus soups before but this is the version I've settled on as my favorite. I'm using my immersion hand blender a ton these days - put it on your Christmas list!

Along with the soup, I served crusty french bread and this Artichoke Tapenade from David Lebovitz. I've been daydreaming of this tapenade ever since. I made a half batch and it fit in my mini-chopper thing and was a good amount for the four of us.

Because I'm that kind of person, I had to look up what makes something a tapenade and not just a dip and found that a tapenade has olives as one of the main ingredients. Had there been any left over, my daughter would have loved it. Olives are one of her favorite foods.

Asparagus Soup (serves 4 - from Gourmet 3/01)

2 pounds green asparagus
1 large onion, chopped
3 tablespoons unsalted butter
5 to 6 cups chicken broth
1/2 cup heavy cream
1/4 teaspoon fresh lemon juice, or to taste

Cut asparagus into 1/2-inch pieces. Cook onion in 2 tablespoons butter in a 4-quart heavy pot over moderately low heat, stirring, until softened. Add asparagus pieces and salt and pepper to taste, then cook, stirring, 5 minutes. Add 5 cups broth and simmer, covered, until asparagus is very tender, 15 to 20 minutes.

Purée soup in a blender until smooth and return to pan. Stir in heavy cream then season with salt and pepper. Bring soup to a boil and whisk in remaining tablespoon butter. Add lemon juice.

Pumpkin Crumb Cake


On Sunday we're going to a pumpkin carving party that our friends from church have hosted for the last 4 or 5 years. There is usually some kind of contest and always a lot of kids and good food. I'm making a dessert this year and it's one I've made for ages. You'll notice that the recipe is a total cheater one with a cake mix but it's always a big hit and tastes even better the next morning with a cup of coffee. If you have a fall brunch to attend, try this out.

Pumpkin Crumb Cake (9x13 pan)

1 yellow cake mix (18.25 oz)
4 eggs
1/2 c. butter melted + 3 T butter, softened
1 can pumpkin (15 oz)
3/4 c. sugar, divided
1/4 c. brown sugar, packed
1 tsp cinnamon
1/4 tsp cloves
1/2 tsp ground ginger
1/4 tsp nutmeg.

Preheat oven to 350 degrees and grease a 9x13 pan. Reserve 1 cup cake mix. In a large bowl, combine the rest of the cake mix with one beaten egg and 1/2 c. melted butter. Mix well and then pat into the bottom of the pan.
In another bowl, mix together the pumpkin, 3 eggs (beaten), 1/2 c. white sugar, brown sugar, and spices. Pour over crust.
In a small bowl, combine the reserved 1 cup of cake mix, 1/4 c. sugar, and 3 T softened butter. Crumble over the pumpkin filling. Bake in the preheated oven for 40-45 minutes or until the pumpkin is just set in the middle.

Variations: I often make it in a large springform and cut it into wedges like a pie. You'll get fewer servings that way but it looks fancier. You can sprinkle 1/2 c. chopped nuts (pecans?) over the top right before baking.

Tuesday, October 20, 2009

Steph's Banana Oatmeal Cookies


While I was on vacation this summer I asked Stephanie to write a guest blog for me. It wasn't a great time for her because she was moving (with a 1 year old, a husband, and a dog) from Ohio to California. Since she's been living closer, we've had a great time cooking together and talking about all the baking we're doing (instead of all the running we should be doing).

A few weeks ago, she sent me this email with the recipes that follows (and the photo):

Hey Bec!
I wanted to share this recipe with you....It's a variation of the banana-oatmeal-chocolate chip cookies that we (especially I) love so much. I found it while I was perusing on-line today (I think I found it in a food blog). Anyway, I thought I would share it with you since you mentioned the other day that you were trying to stay away from sugar. This is a vegan recipe (which we both know I am not one), but I made these cookies this morning with much success. They're moist and delicious, and my taste-tester (baby boy) seemed to enjoy them as well! Let me know what you think.
~Steph

Steph's Banana Cookies 2 dozen

Ingredients:

1/2 c. whole wheat flour
1 c. oats
1/2 tsp baking powder
1/2 tsp baking soda
1/4tsp cinnamon
1 tblsp ground flax seed

1/4 c. agave
1/4 c. soymilk (or regular milk)
1/2 tsp. vanilla
1 T canola oil
2 ripe bananas (mashed)

1/2 c. chocolate chips

Directions:
You know the drill...mix the wet, mix the dry, incorporate the wet into the dry. Fold in chocolate chips. Bake 10-12min at 350 degrees.

The verdict: I tried them on Monday and they were a) incredibly quick to make b) no white flour or sugar - hooray! c) so delicious they were gone this morning. The only change I made was to use 2 T mini chocolate chips instead of 1/2 cup of the regular ones. If you want to be truly sugar free, try nuts instead. Oh, I used steel cut oats instead of rolled oats and I think the texture might be a little better with the rolled oats.

This recipe is a keeper - I loved it and will be making it often, but apparently not as often as Stephanie since her father-in-law keeps bringing her 5 pounds of bananas at a time hoping to be rewarded with a batch of these!

Monday, October 19, 2009

I've always wanted to know

There are certain baking questions that I often ponder but then forget to look up when my hands (and kitchen) are clean enough to do so. I'm not sure you'll be all that interested in this but here it is - mostly for me to read the next time I forget the answers!

Q. What is the difference between white and brown sugar and can I substitute one for the other?
A. Brown sugar used to be made by adding molasses to sugar syrup before crystallization but today it's just white sugar with molasses added after that process. In spite of their difference in weight, you can substitute brown sugar for granulated white on a 1 to 1 basis, and the most significant difference will be taste.
Substitute white sugar for brown sugar on a 1 to 1 basis, but add 1 tablespoon of molasses per cup, and decrease the total amount of liquid in the recipe by 1/2 to 1 tablespoon.
To use honey in place of sugar, use 7/8 cup for every cup of sugar, and reduce the liquid in the recipe by 3 tablespoons.

Q. Why do you use salt in almost every baking recipe?
A. From the research I've done, I think it's all flavor, nothing structural.

Q. Why should eggs be room temperature before baking with them?
A. The idea is that when you beat room temperature eggs, they will have greater volume than their cold counter-parts. This is especially important for whipping egg whites. For cakes and such, the best answer that I can find is that ingredients mix better and emulsify when they're the same temperature and the cake will rise and bake more evenly if everything is the same temperature. If you forget to take your eggs out of the refrigerator ahead of time, you can put them in warm water to bring them to room temperature.

Q. What's the difference between baking powder and baking soda?
A. Both are leavening agents which make baked goods "rise" and baking powser actually contains baking soda. Baking soda is sodium bicarbonate and baking powder contains sodium bicarbonate, but it includes the acidifying agent already (cream of tartar), and also a drying agent (usually starch).
Baking powder is available as single-acting baking powder and as double-acting baking powder. Single-acting powders are activated by moisture, so you must bake recipes which include this product immediately after mixing. Double-acting powders react in two phases and can stand for a while before baking. With double-acting powder, some gas is released at room temperature when the powder is added to dough, but the majority of the gas is released after the temperature of the dough increases in the oven.
You can make your own single acting baking powder by combining 2 parts cream of tartar with 1 part baking soda and 1 part corn starch.

*I found these answers various places and jotted them down to myself without the sources. If you originally wrote anything that I've excerpted above, I give you all the credit and I sincerely apologize.

Wednesday, October 14, 2009

Another birthday to celebrate


My husband was 34 on Tuesday and we celebrated with a special breakfast, dinner at Derek's Bistro and homemade key lime pie for dessert. Needless to say, he and I both love sweets. We had a dessert buffet at our wedding reception and one of the items on that buffet was cinnamon rolls with orange icing. My best friend worked at Bean Town in Sierra Madre at the time and had the baker make a special batch for us.

I haven't made cinnamon rolls in ages. My grandma Vi made amazing Kucha rolls with gooey brown sugar pecan topping and the last time I tried her recipe, it was a bit of a disaster. I will make those again and get it right, but for J's birthday, I needed something simpler.


This recipe uses only 2 bowls, nothing has to rise, and you don't even need to melt butter or bring ingredients to room temperature. I wondered why the recipe said "Cinnamon biscuits" when they were clearly cinnamon rolls, but in my first bite I realized that this was really a biscuit dough.

Like the last soup I posted, I bet you have these ingredients on hand (okay, probably not 1 1/2 cups of heavy whipping cream) and I bet you love cinnamon smells coming from your oven on a rainy morning. Unlike the last post, there's probably no nutritional benefit to these rolls but you can't have everything, right?

Here's the recipe - I made no changes at all except to put some orange extract into the frosting for a subtle orange flavor (no OJ in the house).

Enjoy, and happy birthday, dear J!

Sunday, October 11, 2009

Better than cold cereal


Since pictures of soup rarely look that appetizing and I know certain readers check often for any glimpse of baby girl, I thought I'd start with a photo of what we did today. My normal Sunday afternoon routine is to do a big grocery shopping trip for the week and prepare a nice, Sunday supper. Today after church, we headed out to Fillmore to take a train to a pumpkin patch. It was a long, fun day and by the time we got home, we were hungry, dusty, and tired. I thought we were going to eat out on our way home but we were too tired (and had a 2 year old who never took a nap) so we skipped the restaurant.

I didn't have enough produce to make a salad and I was just getting ready to get out some cold cereal when I thought that a bowl of soup sounded much better. It's been summer for so long that I have no canned soup in the house but luckily, I had the ingredients for this recipe. I made the soup in the amount of time it took my daughter to take a bath and put her PJs on (15 minutes).

It's an old recipe and it's not the best soup I've ever made, but it was warm and filling and better than fast food or cold cereal. Chances are, you have these ingredients in your pantry so if you need something quick and homemade, try it out. I added some Tapatio and red pepper flakes to make it spicier - I was wishing I had a jalapeno to saute with the onion - and served it with shredded cheese and sour cream.

Black Bean Soup (makes 4 cups)

1 medium red onion, chopped
1 15oz can of black beans, drained (you could add more - I only had 1 can)
1 14.5oz can chicken broth (I used 2 cups of the TJ's kind in a carton)
1 T lime juice
1 c. frozen corn (can used canned)
1 c. bottled chunky salsa
salt and pepper to taste

Saute the onion until tender. Take about half of the black beans and mash them with a fork in a small bowl. Add them to the pot with all of the other ingredients and simmer for about 10 minutes or until it's heated through.

*Vegetarian recipe if you use vegetable broth instead of chicken broth

Monday, October 5, 2009

Is it fall, finally?


First, a public service announcement: Do NOT leave wooden spoons too close to gas burners. They will ignite. Your house may smell like a camp fire in a fall-ish way and your 2 year old will be amused, but it is ultimately dangerous.

Now, back to regularly scheduled programming.

It finally feels like fall here - I wore a sweatshirt to the gym this morning, put my daughter in jeans and lace up shoes (tennis shoes? sneakers? what do you call them?) and made soup for dinner . . . hooray! I made this lentil soup and added spicy chicken sausage at the end until it was warmed through. Yum.

This is one of the first desserts that I "made up" all on my own soon after we were married. I haven't made it in years but it sounded like a nice fall complement to our dinner and I had all the ingredients on hand. I drastically reduced the sugar from the old recipe and tonight, I used all whole wheat flour for the topping (and to toss with the apples) but you can use all regular flour and increase the sugar if it's too tart for you.

It turned out good with the changes but you might like a little more topping - you could increase the oats, flour, and butter to 1/2 c. each.

Apple Cranberry Crisp (serves 4)

Peel and chop 3 apples (I used Granny Smith; Stephanie uses Fuji) and mix with 3/4 c. dried cranberries, 1-2 T. sugar, and 1 T flour. Let it sit for 5 minutes or so until the apples are juicy. Spread them in a buttered pan (9x9 or other baking dish). Put it in a 350 degree oven for 20 minutes.

Meanwhile, blend 2 T brown sugar, 1 T agave, 1/3 c. flour, 1/3 c. oats, 1/2 tsp. ground ginger, 1/2 tsp. ground cloves, 1/4 tsp. allspice, and 1 tsp. cinnamon. Add 1/3 c. melted butter. Stir in 1/3 c. toasted pecans (optional).

Crumble topping over hot apples. Bake until the topping is golden brown and juices are thick and bubbly (about 20 -25 minutes more).

Goes well with vanilla ice cream and a cup of coffee!

Friday, October 2, 2009

Save me from myself


If I'm not inspired about making main dishes or figuring out what's for meat these days, I'm way over-inspired when it comes to baking. As in I've made 2 batches (6 dozen) cookies, a cake, granola and a batch of muffins in the last four days and my butt feels huge. The three miles I ran this morning wasn't enough. I need an intervention.

There's a cake in the oven now and if it turns out well, I'll share that recipe soon but what I just finished baking is (luckily for me) to share with friends tomorrow. I'm seeing a college friend that I haven't seen in over two years and we get to meet each other's kids for the first time. So, in honor of that, I baked. As if I need an excuse.

I read about these muffins on Food Librarian and but the recipe is originally from Martha Stewart. The changes that I made were to sub part of the flour for whole wheat (you can use all-purpose for the whole 1 3/4 c.) and I decreased the sugar by 1/4 cup. They are a bit tart with the cranberry and definitely muffins, not zucchini cupcakes, but delicious.

Zucchini Cranberry Muffins (1 dozen)

1 c. all purpose flour
3/4 c. whole wheat flour
1/2 t baking powder
1/2 t baking soda
1/2 t cinnamon
1/4 t salt
2 eggs
3/4 c sugar
1/2 c vegetable oil
1/2 t vanilla
1 c grated zucchini
1/2 cup cranberries, cut in half or quarters

Preheat oven to 375 and grease a muffin tin (or use paper liners). Combine the flours, baking powder, baking soda, cinnamon and salt in a large bowl. Then combine the eggs, sugar, vegetable oil, vanilla and zucchini in another bowl. Add the wet to the dry, and stir until just combined. Then, stir in the cranberries. Don't overmix. Divide evenly in a muffin tin and bake for 18-22 minutes at 375 or until a tester comes out clean.

Thursday, October 1, 2009

Uninspired

I want to make a nice dinner that's not chicken or salmon for my husband tomorrow night. I'm sitting in my windowless office at work totally uninspired. Maybe going to Farmer's Market tonight will help me get some ideas . . or maybe you will! Any suggestions??

Monday, September 28, 2009

Teriyaki Beef Bowls


When I went to Ralph's last week, they didn't have the cut of beef I was looking for so I bought something else. Then, I was at Whole Foods and they had exactly what I wanted and it was way on sale.

So, today I was trying to think of a recipe to make with the beef I bought and didn't really want from Ralphs (boneless top round steak). I found an old bottle of teriyaki marinade in my refrigerator and then looked at the expiration date - August 2007 . . . yikes! I tossed it in the trash and went through some of my recipes and found an old recipe for a Teriyaki Marinade, made some adjustments, and marinated the meat.

We grilled it to about medium and sliced it thinly. I prepared brown rice, steamed some broccoli, red bell pepper, and onion, and made these teriyaki bowls. They were very satisfying and the marinade was flavorful. You can adjust the vegetables to your liking or make a vegetarian version by marinating a grilling some veggies instead of the steak.

Teriyaki Marinade (makes 1.5 cups)

1/2 c. soy sauce
1/2 c. water
1/4 c. sugar
2 T worcestershire sauce
1 1/2 T white wine vinegar
2 T vegetable oil
1 1/2 T dried onion flakes
1 tsp. garlic powder
1/4 tsp. ground ginger
1 T sesame seeds

Combine all ingredients and stir until the sugar dissolves. Marinate meat or vegetables 2 hours before grilling.

For the Bowls (2 servings)

Marinate about 1 pound of steak (flank steak, skirt steak, etc would work well) in the marinade for a few hours (or overnight). Make 2 cups of brown rice. Steam some broccoli, red pepper, onion or other vegetables (mushrooms, bean sprouts, zucchini). Grill the steak to your liking and slice thinly against the grain. Put the rice in a bowl, top with the vegetables, and then the beef. Sprinkle with soy sauce, red pepper flakes, and sesame seeds.

Friday, September 25, 2009

Happy Birthday to Mom


When I was growing up, the six of us sat down to a home-cooked dinner nearly every night. It's only as an adult that I realize what work and commitment this took on the part of my mom to think of a menu each week and do all the cooking. Spaghetti on Monday nights because of Boy Scout meetings, schnitta when there were lots of strawberries at farmer's market, hot cooked egg casseroles and cheese danish on Saturdays or Sundays when we had house guests from Connecticut . . . I don't remember helping her cook much and I'm not proud to say that I do remember complaining about setting or clearing the table.

At the dinner table, we had lively discussions and games and my parents tried to each us manners. I remember a period of time where we had a star chart for each night that none of us 4 kids left the table during dinner. What did we eventually earn? I think it was a bunny.

My mom is a good sport. Paula remembers her spending 8 dollars on imitation rum for her buche de noel and then she and her friends forgot to use it so it sat in the cupboard for years. Kurt remembers the amazing school lunches, in brown bags, waiting for us every day with what we each liked to eat. Mom made me egg salad sandwiches for two or three years straight when that's all I wanted. I think it was Kurt or Paula who liked peanut butter and fluff (marshmallow cream) and there was often a silver disk of a ding-dong or a twinkie at the bottom of those lunches.

On birthdays, we got to pick the meal we wanted for dinner and had a double layer, frosted cake with our names written in icing on the top. On Halloween, we carved pumpkins and mom roasted the seeds. At Christmas, we decorated sugar cookies and mom made homemade carmel corn and at Easter, we dyed eggs (more egg salad sandwiches).

Today, my mom compliments my cooking, pays for my subscription to Cooking Light, and comments on my blog. She's kept our family dinners going and inspires me with new recipes and ideas. I think she enjoys cooking today more than she did in the past and it's something we enjoy doing together. Happy Birthday, mom. I love you!

And, here's what I'm making mom for her birthday dessert: Ice cream sandwiches, of course.

I'm making plain oatmeal cookies for the cookie part and my friend Amber's peanut butter ice cream for the filling. If you're making the ice cream just to eat, stir in a cup of Trader Joe's mini peanut butter cups (or chopped up Reese's peanut butter cups) in the last 5 minutes before the ice cream comes out of the machine.

Peanut Butter Ice cream

1 1/8 cups smooth peanut butter (not natural)
3/4 cup sugar
1 1/4 cups whole milk
1 cup 1/2 & 1/2
1 cup heavy cream (the original calls for 2 cups & no 1/2 & 1/2)
1 1/2 +/- teaspoons vanilla

Use a hand mixer to combine the peanut butter & sugar until smooth. Add the milk and mix 1-2 min. Add the cream, 1/2 & 1/2 and vanilla - mix until combined. Turn on machine, pour in mix, 25 - 35 min until thick. Ice cream will be creamy but soft, freeze if firmer texture is desired.

Tuesday, September 22, 2009

Peace Offering

Lately I'm afraid I've annoyed someone who never liked me that much to begin with. And, I'm a really likable person. Now, this someone has a lot of control in a situation and I'm trying to get back in his good graces. Although we're paying him and he's good at his job, I still want him to like us and do a really, really good job for us. So, I'm baking cookies.

If you want someone to like you, to make a new friend, or to smooth things over, try this recipe. None of that sugar-free healthy baking this time around (okay, I couldn't help myself and didn't use all white flour). No, this is the good stuff. I'll let you know if it works!

Side note: These would be awesome for making ice cream sandwiches!

Chocolate & Peanut Butter Chip Oatmeal Cookies (makes 3 dozen)

3/4 cups all-purpose flour
1/2 cup whole wheat flour (can use all regular flour if you want)
1/2 teaspoon baking powder
1/2 teaspoon baking soda
1/2 teaspoon ground cinnamon
1/4 teaspoon salt
1 1/2 sticks butter, softened
2/3 cup packed brown sugar
1/3 cup granulated sugar
1 1/2 teaspoons vanilla extract
1 large egg
2 tablespoons milk
1 cup chocolate chips
3/4 cup peanut butter chips (can use all chocolate if you can't find these but they're sooo good)
1 cup quick or old-fashioned oats

Preheat oven to 350 degrees. Combine flours, baking powder, baking soda, cinnamon and salt in a small bowl. In a mixing bowl cream the butter. Add the sugars and cream until fluffy. Add the vanilla and egg. Alternately add the milk and flour mixture at a lower speed. Stir in the chocolate chips, peanut butter chips, and oats.

Bake for 10-12 minutes or until the center is still soft and the edges are crisp and the cookies are lightly browned. Cool on the baking sheet for a couple of minutes and then transfer to a wire rack.

Update: Our meeting was cancelled but the cookies still taste good.

Monday, September 21, 2009

Buttermilk Waffles


How do you like your waffles? I like them with berries and plain yogurt. Or, cream cheese and lemon curd. I usually put applesauce or pure maple syrup on my daughter's. My husband likes warm fake syrup and melted butter. Our friend from Dallas ate hers with fake syrup and peanut butter. Any way you top them, waffles are so good.

While I've yet to muster the courage to make the liege waffles I had in Eugene, I tried a new recipe this weekend. My favorite at-home waffles have been these ones but once I used up my last batch of Bisquick, I resolved myself to making breakfast goodies without processed mixes and trans fats.

I looked at Martha Stewart's buttermilk waffle recipe but since it calls for one entire stick of melted butter, I went with Alton Brown's. I liked that he used half whole-wheat flour but most of the spices (and the almond extract) are my additions.

Verdict: Not as crisp as I like (my waffle maker or the recipe? I'm not sure) and a little more dense than the ones I make with club soda but good flavor. I'd like to try replacing half the buttermilk with club soda and see how that turns out.


Basic Waffle Recipe (from Alton Brown - serves 4)

Ingredients
1 c. all-purpose flour
1 c. whole-wheat flour
1/2 teaspoon baking soda
1 teaspoon baking powder
1 teaspoon salt
3 tablespoons sugar
1 teaspoon cinnamon
½ teaspoon nutmeg
1 teaspoon vanilla
1/2 teaspoon of almond extract
3 whole eggs, beaten
2 ounces unsalted butter, melted
16 ounces buttermilk, room temperature

Preheat waffle iron according to manufacturer’s directions.

In a medium bowl whisk together the flours, soda, baking powder, salt, and sugar. In another bowl beat together eggs and melted butter, and then add the buttermilk. Add the wet ingredients to the dry and stir until combined. Allow to rest for 5 minutes.

Ladle the recommended amount of waffle batter onto the iron according to the manufacturer’s recommendations. Close iron top and cook until the waffle is golden on both sides and is easily removed from iron. Serve immediately or keep warm in a 200 degree F oven until ready to serve.

PS - For those of you who are gluten-free, I've been looking for a gluten-free waffle recipe and I'll post one when I try it out.

Saturday, September 19, 2009

Ranch Mashed Potatoes


At a family dinner last February, we had these potatoes and the recipe was a real winner - even my husband who doesn't really like potatoes loved it. The combination of spices was great and I liked the bits of red potato peel. It was pretty light - less than 200 calories per serving and only 3 T of butter. If you need potatoes to go with those steaks you're grilling this weekend, you can make these without turning on the oven. I can't think of any changes I would make to the recipe so here it is (originally from Cooking Light 11/07):

Ranch Mashed Potatoes - (10-12 servings)

Ingredients

13 cups cubed red potato (about 4 pounds)
1/2 cup reduced-fat sour cream
1/4 cup chopped green onions
1/4 cup low-fat buttermilk
3 tablespoons butter, softened
3/4 teaspoon salt
3/4 teaspoon dried basil
3/4 teaspoon dried oregano
1/2 teaspoon garlic powder
1/2 teaspoon freshly ground black pepper
1/4 teaspoon dried dill

Place potato in a big pot and cover with water. Bring to a boil. Put the lid on and simmer 20-30 minutes or until tender. Drain. Place potato in a large bowl and add all the other ingredients. Mash with a potato masher to desired consistency.

Thursday, September 17, 2009

Chocolate Snack Cakes


Lisa recently let me borrow "The Sweet Life in Paris" by David Lebovitz and it's been a great read. Just like Lisa said, it makes you want to be an ex-pat in another country and makes you dream about baking, cooking, and ice cream constantly. Today, I made the Chocolate Yogurt Snack Cakes. I needed to bake something for several different occasions (brother-in-law's birthday, friends coming over, weekend guest) and kept forgetting to buy butter at the grocery story (Julia Child is rolling over in her grave). The Chocolate Snack Cakes - doesn't that sound cute? - were the perfect solution.

I had all the ingredients on hand and although I didn't use great quality chocolate (TJ's semi-sweet chocolate chips) and I should have taken them out of the oven 2 or 3 minutes sooner, they have a distinctly chocolate-almond flavor and are light for a chocolate dessert. Not quite a cupcake, not quite a muffin - truly a snack cake and just what I needed today.


Here's the recipe on Smitten Kitchen. I forgot the salt and lived dangerously by melting the chocolate over low heat (not in a double boiler) but otherwise, followed it exactly. Mine were done in 23 minutes but I should have checked them around 20 minutes.

Tuesday, September 15, 2009

Feels like Fall


While I've yet to make a pot of soup and I'm still not back to school (hooray for teaching on the quarter system), the first Monday Night Football, my first pumpkin spice latte, and my first batch of granola since spring made it feel like fall. While we watched the games last night, we enjoyed something we started making this summer: pizza on the grill.

Anything on the grill makes for less clean up in the kitchen and pizza tastes great this way. Our friend Will makes awesome grilled pizzas and our first try at family dinner was this appetizer. You can easily serve both vegetarians and meat-eaters by making two different kinds and we made a plain cheese one for my daughter.

If you want to try it, I don't have a specific recipe but rather some guidelines.

Grilled Pizza

#1: Preheat the grill until it's good and hot and oil the grill rack.

#2: Trader Joe's premade pizza doughs are awesome but be sure and follow the directions and let the dough rest out of the refrigerator before using it.

#3: Put the dough on the grill and wait until it's all bubbly. Flip it and quickly add the toppings. Close the lid until the dough is done, the cheese is melted, and it's all bubbly and delicious looking.

#4: Cook any meat or vegetable toppings ahead of time. Last night, I caramelized onions and sauteed bell peppers and mushrooms ahead of time. It'll taste better than raw vegetables since the pizza gets done quicker than in the oven. Last night's pizza making session was a little intense trying to get the toppings on the dough quickly.

#5: Use a variety of sauces and cheeses . . . think bbq chicken pizza or pesto instead of a red sauce or gorgonzola cheese - the possibilities are endless.

#6: When you take the pizza off the grill, let it cool a couple of minutes before slicing. I like to slide it right onto a cookie sheet or pizza stone so I can cut it with the pizza slicer thing (what do you call that?)

Go Chargers!!

Wednesday, September 9, 2009

The food you eat before your food


"Appetizers are food you eat before your food to make you more hungry." - Eric Cartman

I don't often make appetizers; when I entertain, my go-to is cut up veggies with some sort of dip or a cheese platter with olives or something like that so I can focus on the other courses. But, I like to make appetizers when I'm going somewhere and that's the only thing I have to think about. I've long been a fan of my aunt's 7 Layer Dip with beans, guacamole, sour cream, avocado, tomatoes etc. and this recipe is another version of that. I saw a recipe in July 08 Better Homes and Gardens that was similar which gave me the idea for it.

It's easy to make your own pita chips to go with this - cut pita bread into wedges and put them in a single layer on a baking sheet coated with olive oil spray. Spray the chips with olive oil spray and sprinkle with salt and bake at 400 for about 15 minutes or until they're slightly brown and chip consistency. I do this with leftover pita all the time so that it doesn't start growing mold.

Layered Greek Dip (makes 2 1/2 cups)

1 8 oz. pkg. cream cheese, softened
1 T. lemon juice
1 tsp. dried Greek seasoning (you can use an Italian seasoning blend)
2 cloves garlic, minced
1-1/2 cups prepared hummus
1 cup chopped cucumber
1 cup chopped tomato
1/2 cup chopped pitted Kalamata olives
1/2 cup crumbled feta cheese
Pita chips for dipping

In a mixing bowl, beat the cream cheese, lemon juice, Greek or Italian seasoning, and garlic with electric mixer on medium speed until smooth and combined.

Spread the cream cheese mixture into a deep 9-inch pie plate, or shallow serving dish. Evenly spread hummus on cream cheese layer. Top with cucumber, tomato, olives, and feta cheese. Serve with pita chips. You can make it ahead, cover it, and refrigerate it for up to 24 hours.

*I haven't tried it yet but I bet you could use goat cheese instead of the cream cheese.