Thursday, December 8, 2016

Green Rice


"There are two kinds of people in the world:  people who wake up thinking about what to have for supper and people who don't." - Lynne Rosetto Kasper

I first read this quote in one of Shauna Niequiest's books and I immediately identified myself as the first kind of person.  I'm sitting here this morning dreaming about this green rice that my mom made a couple of months ago for us and wondering what I'm going to have for supper tonight.  It's warm, filling, and has an amazing flavor.  My mom served it as the base for these rice bowls which were super yummy, but it can stand on its own as a side dish in a lot of different types of meals.  I think it's passed up the cilantro-lime rice as my favorite!  I imagine that long grain white rice would work fine in place of the brown, but you may need to reduce the cooking time so it doesn't get mushy.

Green Rice (makes 3 cups)
From the Cookie and Kate blog

3 T olive oil
1.5 cups long grain brown rice
3 cups vegetable broth
1 1/2 cups baby spinach, lightly packed
1/2 cup cilantro (mostly leaves, some stems are ok), lightly packed
1 jalapeno pepper, seeded, membranes removed, roughly chopped
1 medium shallot, peeled and roughly chopped
1 garlic clove, peeled, roughly chopped
1/4 tsp salt (plus more to taste)

Place the spinach, cilantro, jalapeno, shallot, garlic, salt and 1/2 cup of the vegetable broth in a food processor or blender.  Process until smooth.

Heat the oil in a pot over medium heat.  Add the rice and stir to coat.  Continue stirring until the rice begins to lightly brown.  Stir a little more until most of it is light brown and then add the green puree to the rice.  Stir to evenly coat the rice and stir constantly for a minute.  Add the rest of the broth and bring to a boil. 

Reduce the heat to low, cover, and let simmer until tender (35-40 minutes).  Remove from heat and let it sit for about 10 minutes before serving.

Tuesday, November 22, 2016

Thanksgiving 2016


Happy Thanksgiving!  This has been a year of changing plans.  We originally were going to Connecticut to be with cousins but decided that with my work schedule, it was going to be too short of a trip and wasn't going to work out.  Then, I was hopeful for a trip to Oregon to be with my sisters and parents but an opportunity came up related to a piece of property my husband bought, and the Oregon plan fell through too.  For the first time that I can remember, we'll be having Thanksgiving dinner in a restaurant and with just our kids.  I'm thankful for my family, for our jobs and the opportunities our work affords us, for my kids' school and education, for friends, for a healthy body, and especially for Jesus Christ and the limitless grace that I have inherited through him.

Only kindergarten did a Thanksgiving Feast this year.  The teacher's do a "Charlie Brown Thanksgiving" menu (chicken nuggets, deli turkey, mac & cheese, carrots, dip, jellybeans, popcorn) which I think is perfect if you want 6 year olds to actually eat!  One of the fun ideas was this pinterest inspired Thanksgiving "turkey" that was "carved" to reveal popcorn.


 Even though I'm not eating a traditional Thanksgiving, I'm thinking of surprising my husband with his favorite - a homemade apple pie.   Here's a good recipe that I've had lots of luck with.  You can make your own homemade pie crust or buy a refrigerated one (I won't judge).  I like this Cook's Illustrated version.

Apple Pie (makes 1 pie)
from Simply Recipes

Your favorite pie crust

3 pounds of good cooking apples (I used Fuji)
1 T lemon juice or apple cider vinegar
1/2 cup sugar
3 T flour
1/4 tsp ground allspice
1/4 tsp ground nutmeg
1/2 tsp ground cinnamon
1 T brandy (optional)
1 tsp vanilla extract

1 large egg yolk
1 T cream

Preheat oven to 375 degrees.

Peel, core and slice the apples.  As you cut your apples, add them to a large bowl with the lemon juice or apple cider vinegar to prevent browning.

Combine the sugar, flour, and spices in another bowl.  Add the flour mixture to the apple slices and mix so that the flour is evenly distributed and slices are well coated.  Then, sprinkle with brandy and vanilla and stir to coat all of the apple slices.

Let the apples sit while you line your 9 inch pie pan with the bottom crust.  Arrange the apple slices on top of the bottom crust and mound them in the center.

Place your top crust over the apples, trim the edges and crimp the edges together with the bottom crust.  In a small bowl, use a fork or whisk to combine the egg yolk and cream.  Use a pastry brush to brush the egg wash over the top and edges of the pie.  Cut slits in the top crust for steam vents.

Place pie in the oven and bake for 20 minutes or until the crust starts to lightly brown.  Then, reduce the heat to 350 and bake until the crust is golden and you can see the juice bubbling through the steam vents.  This will take about 40-60 more minutes.  Check it halfway through baking and if it's getting too brown, place a piece of aluminum foil just lightly over the whole thing (Just set it on top - it doesn't need to only cover the edges).

Transfer to a rack to cool for about an hour before serving.

Saturday, November 19, 2016

Favorite Food


What's your favorite food?  It's so hard to pick just one, but if I had to, I'd probably go with burritos. Or, maybe tacos.  Big's favorite food is salmon and Little's is Cinnamon Toast Crunch.  Middle, she loves pancakes.  She's not much of a breakfast eater and we struggle some mornings to get some food in her belly before kindergarten, but pancakes do the trick.  I make a hot breakfast once or twice during the week and on Sundays we've been making pancakes together.  Our Saturdays have had early soccer games and we rush out of the house but hopefully this winter that will change.

Middle loves to help make her favorite food and her signature touch is mini chocolate chips sprinkled on the pancakes while they're on the griddle.  This recipe is from my mom and is tried and true.  I realized that while there are pumpkin pancakes, banana pancakes, almond pancakes and other variations already on the blog, this one had yet to make an appearance.  So, here it is.  Almost as easy as a mix!

Grammy's Pancakes (serves 4)

1 cup flour
2 T sugar
1 T baking powder
1/2 t. salt
1 beaten egg
1 c. milk
2 T cooking oil.

Whisk together egg, milk and oil with a whisk.  Combine dry ingredients in a separate bowl.  Add dry ingredients to wet ingredients and stir until just blended.  Cook on hot griddle.

*Middle suggests after pouring batter on the griddle, sprinkling with mini chocolate chips.

Tuesday, November 15, 2016

Baked Turkey Sliders

I've traveled more this fall both with and without my kids than I have in years and years combined. When I look at the calendar, it gives me a slight sense of panic and it seems like most weeks, I've been preparing for a trip and packing or recovering from a trip and unpacking.  The travel has been awesome - more to come on that.  But, in between the busy weekend trips, ordinary life hasn't seemed so rushed and we've settled into our fall routine.  My husband and I often comment to each other that there's not much more fun than watching these girls with their huge imaginations, fun ideas, and the activities they enjoy.  Here's a little glimpse into our lives these days:
Nail saloning - what a great dad! 
Belated birthday lunch, nail appointment and shopping trip with Big 
Finding sight words in the grocery store
Dreamy the hamster 
Charlotte's Web Diorama
"Reading" my book in the car
New "owl" masks from New Orleans
I've been on this slider kick - my kids like little sandwiches and having a warm sandwich with a cup of soup or salad is a great fall supper.  It's especially nice for those evenings when we're running around with soccer practice, piano lessons, and other activities.

I was inspired to bake these in the oven after my friend from our book club made little hamburger sliders this way.  It looked so easy when she pulled out a whole pan of burgers from the oven!  This is the version that my kids like.  One of them doesn't enjoy the buttery onion/mustard topping, so I don't brush all of them with the topping before baking.  You could jazz up the filling a little bit by adding additional vegetables, condiments, or toppings before baking, but we usually do that after so everyone can make them just the way they like them.


Baked Turkey Sliders (makes 1 dozen)

12 dinner rolls (I often use the Trader Joe's slider buns or the Kings Hawaiian rolls)
12 slices of deli meat (we use turkey and ham)
12 slices of deli thin cheese (provolone or swiss melt nicely)
1/2 cup butter
2 T sugar
1 T honey mustard
2 T dried onion flakes
1 T poppy seeds

Preheat oven to 400 and lightly spray a 9x13 pan with cooking spray.  Place the bottom half of the dinner rolls or buns on the pan.  Spread the deli meat and cheese evenly over the rolls.  Place the top halves on the bottom halves of the rolls or buns to make sandwiches.

In a small saucepan, melt the butter.  Add the sugar, honey mustard, dried onion and poppy seeds and stir constantly until the sugar is dissolved and the mixture has slightly thickened.  Remove from heat.  Use a brush to brush the tops of the buns with the butter/onion mixture.

Bake until the tops are golden brown and the filling is melty - about 15 minutes.

Thursday, November 3, 2016

Halloween 2016


Pumpkin carving - a puppy, a cat, and a sad face

Big as Athena, goddess of war and wisdom
Middle as Owlette from the TV show PJ Masks - no adults knew who she was but the kids at school did!

Little as a ladybug
We had a super fun Halloween this year - costume parade at school, class parties (my first as a room parent), and a party with friends before trick-or-treating.  I was just home from my visit to Oregon which was an amazing weekend (more later), but I was  so glad to be home to see the kids and spend Halloween with them.

There is still some fall left before Christmas (despite what you may see at stores . . . there were eggnog lattes at Starbucks this morning!) so make this yummy cake for someone you love.  I know this recipe starts out with a boxed cake mix, but it's actually from Bon Appetit (2/00) and it's delicious!  Crystallized ginger can break the bank (I've seen it for as much as $12 for a little jar) so you can leave that out or substitute 1/4 tsp of ground ginger.


Pear Spice Cake (8-10 servings)

1 cup (2 sticks) unsalted butter
1 box spice cake mix (18.25 oz)
3/4 cup canned pear nectar
3 large eggs
2 T molasses
1/2 cup minced crystallized ginger
2 pears, peeled, cored, cut into 1/2 inch pieces (about 1.5 cups)
3/4 c. packed brown sugar
1/4 c. whipping cream
pecan halves for garnish (optional)


Preheat oven to 350 degrees.  Butter and flour (or use a good quality baking spray) to prepare your bundt pan.  Melt 1/2 cup butter in a small saucepan over medium heat and stir until slightly brown.  Pour into a large mixing bowl.  Add spice cake mix, canned pear nectar, eggs, molasses, and crystalized ginger.  Using an electric mixer, beat batter 2 minutes.  Fold in pears.  Pour into prepared pan.

Bake until cake is dark brown and tester comes out with some moist crumbs attached, about 45 minutes - 1 hour.

Cool cake in pan on rack for 15 minutes.  Run a knife between pan sides and cake to loosen, invert onto platter and let cool.

Stir brown sugar, remaining 1/2 cup butter, and whipping cream in medium saucepan over medium-high heat until smooth.  Boil for 3 minutes, stirring constantly.  Spoon warm topping over cake.  Garnish with pecans.  Serve at room temperature.

Saturday, October 22, 2016

Fall(ish)

Playdates with new Kindergarten friends

New clips and pedals for a 9 year old!

The one rainy day we've had in months


Haunted House decorating

Hanging out on the goal posts while big sis plays soccer

It's hard to believe it's fall with the 90 degree weather we've been having again in Southern California.  But, we've picked out our pumpkins (can't carve them until right before Halloween or they'll rot) and our Halloween costumes, made pumpkin muffins, and made a cute gingerbread haunted house (my super nice neighbor brought a kit over for the girls).  Since it's still so warm, not to mention we're running from soccer practice, piano lessons, and tennis most evenings, we've still been eating salads, as opposed to soup, for dinner a lot of evenings.  This new recipe from Trader Joe's was delish and will be making a reappearance!


Portabello & Arugula Salad (4 side dish servings)
Trader Joe's recipe

7 oz arugula
6 oz portabella mushrooms
1 T minced shallots
1 T olive oil
1 T balsamic vinegar
3 T pine nuts, lightly toasted
1/2 c. crumbled goat cheese.

Saute shallots in olive oil until translucent.  Toss in mushrooms and cook until tender.  Transfer to a bowl.  Toss with arugula.  Add balsamic and pine nuts.  Add salt to taste.  Top with goat cheese

Thursday, October 6, 2016

Football season!


It's football season and that time of year where I usually bust out my crockpot to make my life easier. One of my easy Monday night or Sunday afternoon meals is to make sliders with shredded chicken.  I know a lot of people do this by making pulled pork, but if you use boneless chicken thighs, it's not dry, it's a little healthier, and just as easy.

I usually start by putting a combination of chicken breasts and thighs (boneless, skinless) in the crockpot, and I pour either half of a can of beer or about a cup of chicken broth over the top.  Sprinkle with salt and pepper, and if you want, add a thinly sliced onion and cook on low for 4-6 hours.

After that, take two forks and shred the chicken.  Drain off almost all of the liquid.  At this point, to accommodate my kids, I divide the meat into two batches and make BBQ chicken with one half (add a bottled bbq sauce and stir).  Then, I usually do something spicier with the other half.

Buffalo Chicken Sliders:  I use Frank's Red Hot sauce and stir it with the shredded chicken until it's well-coated. Then, I toast the slider buns under the broiler and melt crumbled bleu cheese onto half of the bun.  Top with the buffalo chicken and serve!  These little slider buns are from Trader Joe's but my kids also like the Hawaiian Rolls or flour tortillas with the BBQ chicken and melted cheddar or jack cheese.


Tuesday, September 27, 2016

Grown Up Gatherings


In the last year, I've been lucky enough to find two great groups of ladies to hang out with - my monthly book club and my Shot Girls tennis team.  It's not as easy to make new friends as a grown up as it is when you're younger, but when you do, it's a lot of fun.  I recently went to a potluck with my tennis friends to kick off the fall season, and I was thinking about the fact that I got to cook something that didn't have to be "kid-friendly."  For me, this means something spicy that my kids wouldn't eat, so I ended up making jalapeno mac & cheese.

This dish doesn't need much of an explanation or much hype.  Jalapeno mac & cheese.  It was amazing!  Only recipe note:  use whatever cheese you like.  I used a sharp cheddar and a little bit of jack cheese to round it off.  You can omit the breadcrumbs if you want to.


Jalapeno Mac & Cheese (8 side dish servings)

1 lb macaroni (or other noodle of choice)
4 T butter
3 T flour
1 c. milk
4.5 c. shredded cheese 
pepper, paprika, cayenne to taste
1 small can (about 4 T) diced jalapenos
1/2 cup seasoned breadcrumbs

Preheat the oven to 350. Cook macaroni (or noodle of choice) until al dente. Drain and set aside. Melt butter in a medium sized sauce pan and whisk in flour until smooth. Add milk and shredded cheese (for best results, add cheese a little at a time and whisk constantly). 

If it seems too thick, add between a few tablespoons and another half cup of milk. Season with pepper, paprika, and cayenne (to taste). Add  diced canned jalapenos. In a buttered pan, combine the macaroni noodles and the cheese sauce. Sprinkle the top with  the breadcrumbs and bake for 20 minutes.

Thursday, September 15, 2016

Baked Italian Meatballs

First day of 3rd grade, kindergarten, and preschool
Girls U6 - Purple Pandas

Girls U10 - Tangerine Surfers

We're only two weeks into school, and I haven't started teaching yet, but I'm feeling the pressure of two girls with homework, two AYSO teams, and my involvement on two USTA (tennis) teams.  I'm going to be teaching a night class this term and we've decided that with soccer that evening, we'll pick up food.  But, other than that, I'm committed to still cooking at home the other evenings.  I tried this new recipe which was delicious and popular with the kids.  I made a double batch in the afternoon and put half in the refrigerator to bake after soccer practice and the other half in the freezer so we have a meal for another night.  

You can use all ground beef (I did the 93% lean), all turkey, or a combination of both.  I imagine that regular Italian sausage would be yummy as well.  You can make your own sauce or buy it (like I did) and adjust the other seasonings to your family's liking.  I left the cheese off of some of them because one of my kids has been struggling with dairy.


Italian Meatballs (makes about 3 dozen / 8 servings)

1 pound ground beef
1 pound ground turkey sausage
1/2 cup panko  bread crumbs
2.5 cups marinara (divided)
1 T chopped garlic
1-2 T Italian seasoning
3/4 c. grated or shredded parmesan cheese (divided)
1/2 T dried onion flakes (or 1/4 cup diced onion)
1/2 - 1 cup grated mozzarella cheese

Preheat oven to 350 degrees.  In a bowl, combine the ground beef, ground turkey, bread crumbs, 1/2 cup marinara, 1/2 cup parmesan cheese, garlic, italian seasoning, and onion.  Stir until well combined.  Using your hands, roll into small meatballs and place on a foil lined cookie sheet.  I ended up with 3 dozen small meatballs.

Place cookie sheets in the oven and after 10 minutes, use tongs to turn the meatballs.  Cook for a total of 15-20 minutes or until the meatballs are just cooked through.  You don't want them crisped or browned, just so that the meat isn't pink anymore.  You can make them more on the rare side if you use all ground beef.

Remove from the oven and let cool.  At this point, you can refrigerate or freeze the meatballs if you're not ready to eat right away.  I froze half and put half in the refrigerator to finish at dinner time.

When you're ready to eat them, put 2 cups of marinara in an oven safe pan or skillet.  Add the meatballs in a single layer.  Top with mozzarella and 1/4 cup parmesan cheese.  Bake for 20 minutes at 350 degrees or until the marinara is bubbly and the cheese is melted.

Sunday, September 11, 2016

Part II: Kauai

The paradox of Kauai is that on one hand, it's almost impossible to take a bad photo and on the other hand, you can't capture the beauty in a photo.  Here are my best attempts at capturing some of my favorite moments.

The first day we arrived on the island, we walked out to the beach to see this


A big highlight of Kauai was the surf - Big had a blast

And middle learned to surf

Also, the tide pools - we spent a lot of time out there looking at sea life 

And picking up treasures

Look who came to visit!

We love Kauai!


Sunday, September 4, 2016

It's that time again . . .

 Instead of a recipe or food-related post, here are some family vacation photos!  I'm the type of person who loves to look at other people's trip photos but I know not everyone shares my enthusiasm.  If that's  you - sorry!

We took an amazing trip to Hawaii this summer and visited two islands.  This first post is Part 1:  Big Island.  We love the Kohala coast on the big island and are already talking about "next time."  I took many, many photos and this is just a few of my favorite pictures.  Some of my best memories were just experienced, not photographed but I think this captures some of what I loved:

The rope swing at Beach 69.  Pictures can't do this beach justice - perfection!

The two buddies . . . probably playing family or lost girls

The mermaid tail got quite the reactions at the beach

The Kiluea Caldera at Volcano National Park

Celebrating 15 years of marriage with some dear friends at Lava lava Beach Club


Little beach buddies!

End of the road on the north side of the Big Island

Love.

We had such a great time with Hannah and the girls cried when she left!

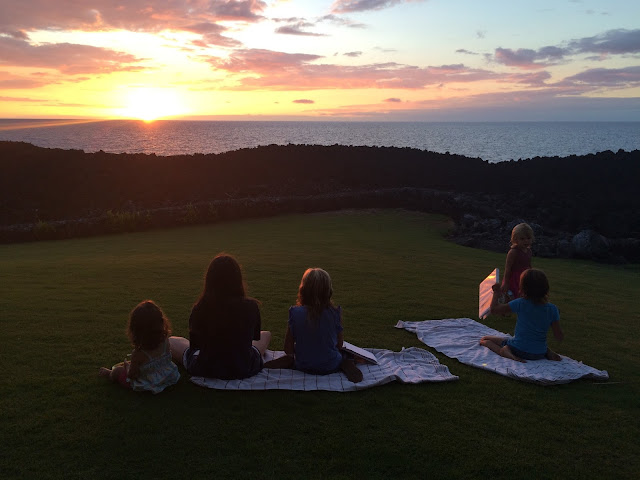
Sunset - amazing to see the canvas of the sky painted with the dying light every night

A kayak towing a boogie board

Cacao Pods - Chocolate Tour

My brave kids swimming at night with manta rays

Little Girls + Sunset


Catamaran Boat ride with the big girls - one of the most fun days.

Luau at the Royal Kona