One of my goals as a mom is to say "yes" to my kids when they want to do something and it might seem inconvenient to me but it would ultimately be good for them. Lately, there have been a lot of requests to cook, bake, and help in the kitchen so I'm trying to take advantage of that. I think this has been inspired by a book we've been reading but more on that in my next post!
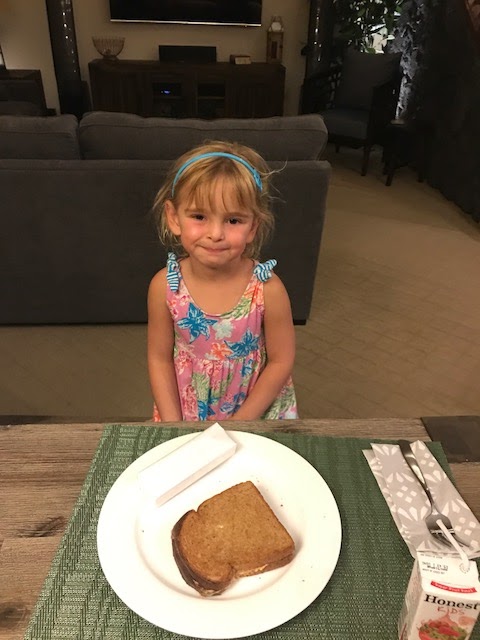
The other night, I wanted to make fried rice with leftover rice and some grilled mahi-mahi that we needed to use up. When I told Big she could make that, Middle wanted in on the action, so I said she could be in charge of the kids' food that night. She made grilled cheese with a side dish of ice cream sandwiches. Little was very happy with the side dish choice and her chore for the evening was setting the table.
Big did a pretty good job following the recipe . . . I had to help her scramble the egg, do some chopping, and judge when the rice was fried enough.
You can find the original recipe for fried rice here. We added the grilled mahi-mahi at the end until it was heated through. If you haven't seen my technique for grilled cheese - it's a complete lifesaver and now that Middle can do it, she can help me out at lunch time or supper time.
Showing posts with label rice. Show all posts
Monday, July 3, 2017
Thursday, December 8, 2016
Green Rice
"There are two kinds of people in the world: people who wake up thinking about what to have for supper and people who don't." - Lynne Rosetto Kasper
I first read this quote in one of Shauna Niequiest's books and I immediately identified myself as the first kind of person. I'm sitting here this morning dreaming about this green rice that my mom made a couple of months ago for us and wondering what I'm going to have for supper tonight. It's warm, filling, and has an amazing flavor. My mom served it as the base for these rice bowls which were super yummy, but it can stand on its own as a side dish in a lot of different types of meals. I think it's passed up the cilantro-lime rice as my favorite! I imagine that long grain white rice would work fine in place of the brown, but you may need to reduce the cooking time so it doesn't get mushy.
Green Rice (makes 3 cups)
From the Cookie and Kate blog
3 T olive oil
1.5 cups long grain brown rice
3 cups vegetable broth
1 1/2 cups baby spinach, lightly packed
1/2 cup cilantro (mostly leaves, some stems are ok), lightly packed
1 jalapeno pepper, seeded, membranes removed, roughly chopped
1 medium shallot, peeled and roughly chopped
1 garlic clove, peeled, roughly chopped
1/4 tsp salt (plus more to taste)
Place the spinach, cilantro, jalapeno, shallot, garlic, salt and 1/2 cup of the vegetable broth in a food processor or blender. Process until smooth.
Heat the oil in a pot over medium heat. Add the rice and stir to coat. Continue stirring until the rice begins to lightly brown. Stir a little more until most of it is light brown and then add the green puree to the rice. Stir to evenly coat the rice and stir constantly for a minute. Add the rest of the broth and bring to a boil.
Reduce the heat to low, cover, and let simmer until tender (35-40 minutes). Remove from heat and let it sit for about 10 minutes before serving.
Thursday, March 17, 2016
For the love of dinner . . .
I have a confession to make. I have been feeding my family a lot of prepackaged crap lately. If you're picturing Lunchables, Uncrustables, Kraft Mac & Cheese, and bags of frozen P.F. Chang's stir fry, you're on the right track. But, I've been thinking about this book I read last year (and have mentioned on this blog ad nauseum, I know) "Bread and Wine" and her attitude towards cooking and food. We had a disappointing day last month where baby girl got sick on the night we were supposed to meet my family for my birthday dinner. The big girls had plans but we were staying home with Little and i had all intentions of getting take out. But, I rallied, channeled my inner Shauna Niequiest and came up with the menu that included those Lemon Souffles.
One of the things I made was her risotto. It did not disappoint! I loved the process and the end result was the perfect complement to the lamb chops and roasted asparagus. I used some chopped up thyme at the end because that was what was on the lamb. I will be making this again soon - the mushroom version, probably. And, it felt good to make a whole meal of real food that was more appealing than something that comes frozen or in a box. I'm trying to keep that in mind and feed my family better!
Basic Risotto
from Shauna Niequist
Reposted from here
6 cups chicken broth
2 cups arborio rice
4 cloves garlic
oil
1 cup white wine
1 onion
parmesan cheese
salt and pepper
It's really hard to do this recipe justice, so here it is in her own words:
I put about six cups of chicken broth in a smaller pot to warm up, and then I chop a few onions. You know, two, maybe. And not a fine chop—just so that they’re slender and bite-able.
I let a thin layer—not too thin, but not a pool–of olive oil heat up in the dutch oven, and then I add the onions. I let them soften on medium to medium-low for five minutes or so while I press four or six cloves of garlic and throw them in the pan with the warm oil. Then I give it maybe three more minutes, till the onions are translucent and the garlic smell fills the house.
When the garlic and onion are translucent, smelling fantastic, throw in two cups of Arborio rice—that will make a whole lot of risotto, so be ready. 6 or 8 servings, but delicious leftovers. The rice sizzles and pops in the oil for a while, so stir, stir, stir, and then when it seems to be coated thoroughly, add some wine.
Really, I’m not picky about the wine. I guess I like pinot grigio the best for risotto, or champagne. But I’ve used whatever’s open—even red is fine, although it does turn the whole thing a little pink, which is not a problem at all, I’ve found.
Add a big glass of wine, and stir, stir, stir. Wooden spoon, by the way. The wine will release a fantastic smell. Give it a little time to soften, and then when the wine is absorbed, add a cup of warmed broth, and again, stir, stir, stir.
Basically, at this point, you’re trying to keep it from drowning, and keep it from drying out. So add a little bit more, stir a little bit more, feel free to turn the heat down if it feels a little out of control. David Tanis, in his fabulous cookbook A Platter of Figs, says that you want to see “sinkholes” and that’s a great way to put it. Not aggressive boiling, not lazy simmering. Sinkholes, exactly. Keep adding broth cup by cup. Stir every few minutes.
Every recipe I’ve read says 18-20 minutes from this point, but to be honest, it always takes me longer. Keep tasting along the way, and when you’ve added six-ish cups of broth, and when the rice feels soft at first, but still with a bite in the middle, you’re there.
I think some people may get into trouble with risotto because they expect there to be no gritty hardness at the center of each grain, so they overcook by a long shot. As long as you know there will always be that hard little center, you won’t overcook.
Just two more things to throw in at this point: parmesan, for sure. A handful mixed in, and a small handful to throw on top right at the end. As with anything, taste for salt, but I tend not to use much, because I find the broth and the parmesan add enough. Finish with just a little bit of Italian flat leaf parsley for color, and there you go.
Other risotto variations:
While you’re watching, stirring, and adding stock from time to time, slice up a whole bunch of mushrooms—as many kinds as you like–and soften them in a tablespoon or so of butter. When they’re soft, pour in some cognac or white wine and cook just a little longer. When the risotto is cooked, stir in the mushrooms and their yummy juices from the pan.
I love chopped sundried tomatoes, soaked in hot water if they were dried. Fresh spinach and toasted pinenuts are great with the tomatoes. Peas and asparagus and lemon zest are great. I love shrimp in it, maybe with a little bacon and something green—arugula? Artichokes? Roasted chicken or chicken sausages are great, too.
Sunday, January 29, 2012
Spanish Rice in the Crockpot
My cousin has a cooking blog and I always look forward to reading what she's made on Tuesday nights. She's a great cook, way more daring than I am (check out her mad bread making skills). In one post, she reminded me of the spanish rice in the crockpot that my grandma and mom used to make. I have my own homemade (that is, not from a box with a seasoning package) version of this, but the crockpot is really convenient sometimes.
This past weekend I made a crockpot of Chipotle Carne Asada and a crockpot of the rice. However, I made a bit of a mistake . . . I used Thai Jasmine rice instead of a regular long grain rice and it got sort of mushy. But, I added some spices to the family recipe and really liked the overall flavor. I used 2.5 cups of rice and 5 cups of liquid and it made a crockpot full . . . we had 20 guests and I had tons of leftovers (maybe because it was so mushy??)
Spanish Rice (6 side dish servings)
1.5 c. raw long grain rice
1/4 c. olive oil
1.5 c. tomato juice (I used low-sodium V8)
1.5 c. water
1 small onion, chopped
1 small green bell pepper, finely diced
2 tsp. chili powder
1 tsp. ground cumin
1/2 tsp. ground chipotle pepper (or paprika or for a kick, 1/4 tsp. cayenne)
1/2 tsp. salt
Saute the rice, onion, and bell pepper in the olive oil until the rice is golden brown and the onion & pepper are soft. Put it in a crockpot with the rest of the ingredients. Stir well. Cover and cook on low. My cousin's instructions say low for 4-6 hours or high for 2-3 hours. My crockpot is notoriously hot / fast and I checked it when the liquid was absorbed at about 2 hours on low and it was done.
Friday, January 13, 2012
Chicken, Mushroom & Brown Rice Casserole
People can be divided into two camps: those who enjoy a good casserole and those who are skeptical of anything resembling a casserole. My girls are the suspicious type (they like all the parts of their meal separated) and my husband and I are the first type (even though we have a relatively high bar). Casseroles remind me of church suppers and bringing (or being brought) meals when a baby is born or someone is sick.
It seems like casserole recipes of this sort usually rely on condensed soup to hold it all together. I liked how this was just sour cream, cheese and broth. For a casserole, the lean protein, brown rice, and vegetables make it a relatively light option. You could probably add zucchini, celery or other vegetables to the beginning of the recipe and I bet wild rice would work as well as brown rice if you had that handy. Also, if you wanted to lighten it even further, you could omit the last cup of cheese on top (but that part was especially yummy!). Bonus: It's gluten free, you can make it ahead of time (see note at end) and I used a rotisserie chicken which made this super quick to put together. Just take into consideration the cooking time of the brown rice (or you could use the already cooked brown rice from Trader Joe's).
For those of you who like casseroles, here are a couple of other options on the blog:
Chicken and wild rice casserole
Sherry lamb casserole
Chile relleno casserole
Sue's egg casserole
Puffy egg casserole
Chicken, Mushroom, and Brown Rice Casserole (serves 6)
2 c. cooked long grain brown rice
16 oz mushrooms, washed, thickly sliced, slices cut in half
1 onion, diced
1/2 cup diced carrot
2 tsp. ground thyme
1/2 tsp. poultry seasoning (I used a lemon herb one from Williams Sonoma)
1.5 - 2 c. diced cooked chicken (or turkey)
1/2 c. chicken broth
1/2 c. low fat sour cream
1/2 c. coarsely grated parmesan cheese
2 c. grated low-fat cheese (I used a cheddar jack blend) - divided
salt, pepper and olive oil
Cook brown rice according to package directions and let it cool. Preheat oven to 375 degrees. Heat 2 teaspoons of olive oil in a large non-stick pan and sauté the mushrooms until they're starting to brown and all the liquid has evaporated. Remove them to a dish.
Add the onions and carrot to the same pan. Add a little more olive oil and sauté 4-5 minutes or until the onion has softened. Add the thyme, poultry seasoning, some salt and pepper, and sauté about 2 minutes more. Turn off the heat and add the chicken, mushrooms, and rice (if your pan isn't large enough, combine the vegetables, chicken and rice in a large bowl). Gently stir until all the meat and vegetables are evenly distributed in the rice.
In a small bowl, whisk together sour cream and broth. Then stir in the parmesan cheese and 1 cup of the grated low-fat cheese. Gently stir the sour cream mixture into the rice mixture. Spray a 2 quart casserole dish with non-stick cooking spray (or brush with olive oil). Spoon the rice mixture into the dish and press down to evenly distribute. Bake for 25 minutes or until casserole is slightly bubbling and barely starting to brown. Sprinkle with the second cup of cheese and bake about 15 minutes more. Serve hot.
Make ahead: I made it up to the point of putting it in the oven and refrigerated it. Then, I added 5-10 extra minutes to the baking time.
Tuesday, December 27, 2011
Balsamic Chicken & Oven Baked Risotto
Merry Christmas to all of you! This week between the holidays is a little weird - Claremont is empty and I'm wondering where everyone went. Big sister had preschool today and there were only 5 kids there in the whole preschool. Maybe everyone is vacationing somewhere tropical? I might normally be jealous of that idea, but right now I'm happy to be home (not having to go on an airplane anywhere) and enjoying some time with family. We're hosting family dinner tonight and headed back to my mom's on Thursday night - fun!
So, did you know that you can make risotto in the oven? It actually turned out awesome with a lot less hands on time. I'll be making it again soon! I only made a very basic version with parmesan cheese but I bet a lot of risotto flavors / variations would work with this technique. I made it to go with a favorite chicken recipe that's never made it on the blog so both recipes are below. Usually I do the pan sauce for the chicken like the recipe below, but this time, I skipped it and just sliced and served the chicken over the risotto. I put a little caprese salad garnish on top . . . would have been better on the side because the chicken and risotto made it warm and it wasn't great that way.
Balsamic Roasted Chicken (serves 4)
from Giada de Laurentis
- 1/4 cup balsamic vinegar
- 2 tablespoons Dijon mustard
- 2 tablespoons fresh lemon juice
- 2 garlic cloves, chopped
- 2 tablespoons olive oil
- Salt and freshly ground black pepper
- 4-6 boneless skinless chicken breasts (or pieces)
- 1/2 cup low-salt chicken broth
- 1 teaspoon lemon zest
- 1 tablespoon chopped fresh parsley leaves
Whisk the vinegar, mustard, lemon juice, garlic, olive oil, salt, and pepper in small bowl to blend. Combine the vinaigrette and chicken pieces in a large resealable plastic bag; seal the bag and toss to coat. Refrigerate, turning the chicken pieces occasionally, for at least 2 hours and up to 1 day.
Preheat the oven to 400 degrees F. Remove chicken from the bag and arrange the chicken pieces in a large greased baking dish (or Dutch oven). Roast until the chicken is just cooked through, about 30-40 minutes. If your chicken browns too quickly, cover it with foil for the remaining cooking time. Transfer the chicken to a serving platter.
At this point, if you're using a Dutch oven that can go on the stove, place it on a burner over medium-low heat. Whisk the chicken broth into the pan drippings, scraping up any browned bits with a wooden spoon and mixing them into the broth and pan drippings. Let it come to a boil and reduce a bit. Drizzle the pan drippings over the chicken. Sprinkle the lemon zest and parsley over the chicken, and serve.
Alternatively, you can dump the drippings and any leftover marinade into a saucepan with the broth and make the pan sauce that way. I've also eaten the chicken without making a pan sauce at all (skipping the broth part altogether).
Oven baked Risotto (serves 4-6)
1 1/2 c. arborio rice4 1/2 c. chicken or vegetable broth
3/4 c. finely grated parmesan cheese
2 T butter, cut into small pieces
salt and pepper to taste
Preheat oven to 350 degrees. Pour rice and broth into a large baking dish (or Dutch oven) and stir to combine. Cover and place in the oven for 45 minutes, or until most of the liquid is absorbed and the rice is al dente.
With a wooden spoon or spatula, beat in the parmesan, butter, salt and pepper. Serve immediately.
Tuesday, October 4, 2011
Greek Lamb Pilaf
I wasn't expecting this meal to be as awesome as it turned out. For me, this is comfort food at it's finest and a perfect fall dish. It only takes about a half hour to cook if you chop up stuff ahead of time and you can make it in one pan. The leftovers didn't last long in our house!
If you're not a big fan of lamb or haven't tried it before, lean ground lamb is a good introduction to the flavor without it being overbearing. If you're particularly averse, you could use lean ground beef in its place. The dish is gluten free (as long as you use GF broth) and the nutrition information from Cooking Light says this is about 440 calories/serving and 26 grams of protein.
Greek Lamb Pilaf (4 servings)
(from Cooking Light 6/08)
2 c. chopped onion (about 1 large)
3/4 c. chopped carrot (about 1 large)
3 garlic cloves, minced
3/4 pound lean ground lamb
1 c. uncooked long-grain rice
1/4 teaspoon ground cinnamon
1 (14 oz) can chicken broth (low-sodium)
1 c. chopped plum tomato (about 1)
1/4 c. chopped fresh flat-leaf parsley
2 T chopped fresh mint
3 T fresh lemon juice
3/4 tsp. salt
Heat a large nonstick skillet over medium high heat. Add first 4 ingredients to pan; cook 5 minutes, stirring to crumble lamb. Stir in rice and cinnamon and saute for 2 minutes. Stir in chicken broth; bring to a boil. Cover, reduce heat and simmer 20 minutes or until liquid is absorbed.
Remove from heat; stir in chopped tomato, parsley, mint, lemon juice and salt. Cover and let stand 5 minutes before serving.
Tuesday, August 9, 2011
Wild Rice Salad
As you can see from the posts in the last month or two, we've been eating a lot of salads this summer. The other morning before he left for work, my husband asked what was for dinner. I said that I had no idea and asked what he'd like to have (aren't I nice??) He answered, "some sort of salad with wild rice" and he got what he wanted!
I saw this awhile back on Simply Recipes and made the recipe exactly like it was posted on Elise's blog. I bought some roasted turkey to add and forgot to add it . . . maybe next time. Shredded rotisserie chicken would also probably work well in this salad if you wanted more protein. I didn't think it would be as spectacular as it was but the combination of flavors and textures and the sesame oil made it sort of addicting. We polished off a half recipe between the two of us!
Wild Rice Salad (8-10 side dish servings)
1 cup long grain rice
1 cup wild rice
4 cups chicken broth (or water or veg broth)
4 stalks celery, sliced
8 green onions, sliced
2 cups thawed frozen peas
1/2 cup pine nuts, toasted
3/4 cup dried cranberries
salt and pepper
1/4 c. olive oil
2 T red wine vinegar
1 tsp sugar (ok, I lied - I left the sugar out)
2 T dark sesame oil
Put the broth (or water) in a medium saucepan. Add the rice and wild rice, bring to a boil, reduce heat to low, cover. Let cook for 40 minutes. Remove from heat and cool completely.
Whisk together the olive oil, red wine vinegar, sugar and sesame oil.
In a large bowl, gently mixed together the cooled cooked rice, dressing, and other ingredients. Add salt and pepper to taste. Chill completely before serving.
Tuesday, March 29, 2011
Baked Cheesy Rice
How about a super easy side dish that everyone loves? I first had this cheesy rice at a friend's house for dinner and didn't think it would be such common ingredients. Once I got her recipe, I've made a bunch of variations. The other night, I just made 2 portions in a small ramekin with gruyere cheese and thyme (no chiles) to go with some steaks my husband grilled - yummy. My daughter is like her daddy and doesn't really like potatoes so those cheesy potato casseroles are wasted on her but she'll eat this! You can also easily make large quantities (Easter dinner? Potluck?). Sometimes I decrease the sour cream and leave the cheese off the top to make it a little healthier (not much, but a little).
Chile Cheese Rice
1 cup long grain white rice
1 4oz can diced green chiles
1 1/3 c. sour cream
2 c. shredded jack cheese
Lawry's seasoned salt
Cook rice according to package directions. Combine cooked rice, chiles, sour cream, 1 1/2 c. of the cheese, and seasoned salt. Scrape into a greased 1 1/2 quart baking dish. Sprinkle remaining cheese on top. Bake uncovered at 350 degrees for 30 minutes. Don't overcook or it'll dry out!
Thursday, November 18, 2010
Fall days
How is it already November 18?? We're going to big sister's preschool for "Thanksgiving Feast" tomorrow (vegetable soup made by toddlers . . . yum?) and real Thanksgiving is only a week away. Even though it's fall and not spring, some things have been growing around our house:
Here's a fall side dish for you to try. It'll easily round out a fall supper menu and tastes great. We polished this off (3 adults and 1 kid) last night. I started it in the afternoon and let the cooked wild rice sit until dinner time when I added the rest of the stuff to it. It can be served warm or at room temperature and will be fine in the refrigerator for a few days. And, it looks pretty!
Wild Rice Pilaf (serves 6)
from Martha Stewart
1 T olive oil
1 small shallot, diced
1 c. wild rice
2 1/2 c. chicken or vegetable stock
1/2 c. toasted pecans
1/4 c. dried cranberries
2 T chopped flat leaf parsley
salt and pepper
Saute the shallot in the olive oil until soft. Add the rice and saute for 1 minute. Stir in the stock and let it come to a boil. Cover and simmer for 40-50 minutes or until the rice is soft. Stir in the pecans, cranberries, parsley, salt and pepper and serve!
Big sister's plants
Piles of laundry & diapers
The baby (15 weeks old!)
The fall craft projects hanging on the kitchen wall
Wild Rice Pilaf (serves 6)
from Martha Stewart
1 T olive oil
1 small shallot, diced
1 c. wild rice
2 1/2 c. chicken or vegetable stock
1/2 c. toasted pecans
1/4 c. dried cranberries
2 T chopped flat leaf parsley
salt and pepper
Saute the shallot in the olive oil until soft. Add the rice and saute for 1 minute. Stir in the stock and let it come to a boil. Cover and simmer for 40-50 minutes or until the rice is soft. Stir in the pecans, cranberries, parsley, salt and pepper and serve!
Saturday, July 3, 2010
Cilantro Lime Rice

I know making rice isn't rocket science. I've relied on boxes of rice pilaf (Near East is my favorite brand) for a long time but lately, I've been skipping the box and spice packet and spicing it up myself. I've also noticed that the step of toasting the rice a little before adding the liquid makes the end product a lot better.
Here's one of our current favorites, modeled after the rice they use at Chipotle. It goes well with Mexican flavored dishes or grilled fish. I like it in burritos or with tacos al carbon. Hope you like it as much as we do!
Cilantro Lime Rice (4 servings)
Ingredients:
1 tablespoon oil
1/2 onion (chopped)
1 clove garlic (chopped)
1 cup long grained rice (I like to use brown)
2 cups water
1 handful cilantro (chopped)
1 lime (juice and zest)
Directions:
Heat the oil in a saucepan. Add the onion and saute until tender, about 5-7 minutes. Add the garlic and saute until fragrant, about a minute. Add the rice and toast in the oil for a few minutes.
Add the water, bring to a boil, reduce the heat and simmer, covered until tender, about 20 minutes for white rice or 40-50 minutes for brown. Remove from the heat and mix in the cilantro, lime juice and zest.
Sunday, May 30, 2010
Fried Rice

Yesterday I started dinner by making the jasmine rice. Then, my husband came home and announced he wasn't hungry. And, to tell the truth, I wasn't either. I ended up eating a yogurt and an apple before bed but no dinner (except for the little person) and no dishes was fine by me. So, today I went to make the rest of that dinner and was looking at cold white rice. I don't have a microwave and was thinking about the best way to reheat it when I decided to make fried rice instead.
A couple of things that I know about fried rice - day old cold rice works best, you can tailor the seasoning and vegetables to your likening, and it's better if you don't stir it too much but spread it out in the pan and stir it a little less than you probably want to.
It turned out great - I didn't have green onion but it's better with it and I'll put that in the recipe anyways. We had it with grilled tuna and some green beans. Even the little girl ate her dinner tonight!
Fried Rice (2-3 servings)
1/2 cup rice cooked in 1 cup of water (forgot to measure the cooked rice today), refrigerated overnight.
1/2 cup frozen peas
1/4 cup diced carrots
2 green onions, thinly sliced
1 egg
1 -2 T soy sauce
1 tsp sesame oil
salt and pepper
Cook the frozen peas and diced carrots in a little boiling water for a couple of minutes or until the vegetables are soft. Set aside. Beat the egg with a fork, season with salt and pepper and stir in the green onion. Heat a wok or saute pan over medium high heat. Add the vegetables and saute for 1-2 minutes. Add the egg and scramble it until it's almost cooked through.
Add the cooked rice to the pan and spread it so it covers the whole pan. Drizzle the soy sauce and the sesame oil over the top. After about a minute, stir it all up and spread it out again. Repeat it once or twice until the rice is just looking a little crispy and the texture you want (may need to taste it to see).
You can adjust the flavors after it's done cooking by adding a little more soy sauce or pepper (or red pepper flakes).
Thursday, July 9, 2009
Summer craving?
Have you ever brought produce home and had no idea why you bought it or what you were going to make with it? Usually when that happens to me, I'm at farmer's market and some seasonal fruit or vegetable looks so good that I can't pass it up. The other day, I came home from Ralph's with sweet potatoes - not in season, not particularly beautiful, and no agenda for eating them any time soon. Maybe it was those brownies in the past few weeks that made me think of sweet potatoes. Or, which seems strange, maybe I'm craving winter foods in the middle of summer.
We were going to barbecue steaks for meat that night and I couldn't stand the thought of heating my oven just to bake some sweet potatoes so I came up with an alternative - put them together with some rice. I thought the earthy nuttiness of brown rice and would go well with the sweetness of the sweet potatoes. The result was nutritious and looked pretty but more bland than earth-shattering. I think next time I'd leave out the thyme and go with a bolder spice - maybe curry powder or cumin. This would make a nice vegetarian main dish with the addition of more veggies (zucchini and fresh peas come to mind).
I have one more big, fat sweet potato left and I'm going to use it in a spinach salad that I'm making for dinner tonight. My plan is to slice it into thin wedges, toss it with a little oil, a little apple cider vinegar, salt and pepper, and roast it in the oven on a cookie sheet at 400 degrees for 20 minutes or so. I'll also put some sliced onion, hard boiled egg, some red bell pepper, and shredded carrots in the salad.
Sweet Potato Brown Rice Pilaf (4 servings)
1/2 c. onion, diced
1 1/4 c. sweet potatoes, peeled and cut into 1/2 inch chunks
1/2 c. brown rice
1 1/3 c. broth or water
1 tsp. thyme
salt and pepper
olive oil
Saute onion in 1-2 tsp. olive oil for a couple of minutes. Add a little more oil and the sweet potatoes and saute for 4 minutes. Add the rice and saute 1 minute. Add broth and thyme and bring to a boil. Cover, reduce the heat to a simmer, and cook for 40-45 minutes or until all liquid is absorbed and the sweet potato is soft. Add salt and pepper to taste.
We were going to barbecue steaks for meat that night and I couldn't stand the thought of heating my oven just to bake some sweet potatoes so I came up with an alternative - put them together with some rice. I thought the earthy nuttiness of brown rice and would go well with the sweetness of the sweet potatoes. The result was nutritious and looked pretty but more bland than earth-shattering. I think next time I'd leave out the thyme and go with a bolder spice - maybe curry powder or cumin. This would make a nice vegetarian main dish with the addition of more veggies (zucchini and fresh peas come to mind).
I have one more big, fat sweet potato left and I'm going to use it in a spinach salad that I'm making for dinner tonight. My plan is to slice it into thin wedges, toss it with a little oil, a little apple cider vinegar, salt and pepper, and roast it in the oven on a cookie sheet at 400 degrees for 20 minutes or so. I'll also put some sliced onion, hard boiled egg, some red bell pepper, and shredded carrots in the salad.
Sweet Potato Brown Rice Pilaf (4 servings)
1/2 c. onion, diced
1 1/4 c. sweet potatoes, peeled and cut into 1/2 inch chunks
1/2 c. brown rice
1 1/3 c. broth or water
1 tsp. thyme
salt and pepper
olive oil
Saute onion in 1-2 tsp. olive oil for a couple of minutes. Add a little more oil and the sweet potatoes and saute for 4 minutes. Add the rice and saute 1 minute. Add broth and thyme and bring to a boil. Cover, reduce the heat to a simmer, and cook for 40-45 minutes or until all liquid is absorbed and the sweet potato is soft. Add salt and pepper to taste.
Sunday, April 5, 2009
Coconut milk

I'm back. It's been a long two weeks with spring break, some fun stuff, and some sad stuff and very little cooking at home. But, now I'm back to real life, cooking, and my blog.
I've liked coconut for a long time but recently have discovered two easy coconut recipes that I'm really getting addicted to: Coconut rice and Coconut oatmeal. The coconut rice started as a side dish for a chicken curry crock pot recipe that I found online. The first time I made it (and, I admit, every time since) I ate the cold leftovers standing in front of the refrigerator the next day. I couldn't even go to the table and sit down like a civilized person before I wolfed them down.
The coconut oatmeal is new. I put some shredded coconut on our oatmeal the other morning and it was wonderful. It probably has something to do with the fact that my shredded coconut is sweetened and I usually eat my oatmeal unsweetened (I put cinnamon and dried cranberries or raisins in the water before adding the oats). It was so good and I asked my sisters and sister in law if they've ever tried making it with coconut milk. They had. How was I just now thinking of this? So this morning, I made a bowl and while not too sweet, it was delicious.
Coconut milk is made by simmering together the meat of the coconut and some water and then straining out the solid parts. I sometimes use "light" coconut milk which is sort of like using 2% or skim milk - less flavor and less fat. While I was researching using coconut oil topically for my daughter's excema, I came a lot of information on the health benefits of coconut in diet. From what I read, the idea that coconut milk or oil is unhealthy because of saturated fat is a myth - it's a "good" kind of fat that is similar to what's in breast milk and can improve brain development. Check this out if you're interested in more of that information.
Two simple recipes:
Coconut Rice
Cook rice according to package directions but substitute half of the water for coconut milk, omit any other fat (olive oil) and don't use salt. I think it's great with brown rice but I've also made it with regular white rice and jasmine rice.
Coconut Oatmeal
Cook oatmeal according to package directions but substitute 1/2 to 3/4 of the water for coconut milk.
This morning, I heated 1/2 c. water, 1/2 c. coconut milk, and 1/4 cup raisins to a boil. I added 1/2 c. rolled oats and cooked, stirring, until it was the consistency that I like.
Monday, March 23, 2009
Spanish Rice
For years I've bought packages of spanish rice and made them from the box when I'm cooking Mexican food. I've had favorites over the years (the Farmhouse brand one that was discontinued, the Near East one) but one day I decided that a) it can't be that hard to make myself, b) I wasn't sure about what was in those little seasoning packets, and c) it's probably a lot cheaper.
I've made this three or four times in the last couple of months and it's been a big hit. The first time I made it with regular old white rice and since then I've made it with brown rice. I'll tell you how to make it either way and some ways to spice it up a bit.
Spanish Rice (4 servings)
1 cup white or brown rice
1 T canola oil
1 (14 oz) can of diced tomatoes
1 (4 oz) can of diced green chiles (or jalapenos)
1 onion, diced
1/2 bell pepper, diced
1 1/2 tsp. chili powder
1 tsp. ground cumin
1/2 tsp. salt
2 cups water
Saute the onion, bell pepper, and rice in a deep skillet until the onion is soft and the rice is just starting to turn brown. Add the rest of the ingredients (don't drain the can of tomatoes and can of chiles) and bring to a boil. Turn the heat down and simmer, covered until the liquid is absorbed. For white rice: cooking time will be about 30 minutes. For brown rice: cooking time will be between 50 minutes and 1:15. Tonight I tripled the recipe using brown rice and let it cook for about an hour and a half.
For spicier rice: Add cayenne and red pepper flakes with the rest of the spices and/or substitute jalapenos for the green chiles.
I think a nice finishing touch is stirring in some chopped cilantro when you're ready to serve it.
I've made this three or four times in the last couple of months and it's been a big hit. The first time I made it with regular old white rice and since then I've made it with brown rice. I'll tell you how to make it either way and some ways to spice it up a bit.
Spanish Rice (4 servings)
1 cup white or brown rice
1 T canola oil
1 (14 oz) can of diced tomatoes
1 (4 oz) can of diced green chiles (or jalapenos)
1 onion, diced
1/2 bell pepper, diced
1 1/2 tsp. chili powder
1 tsp. ground cumin
1/2 tsp. salt
2 cups water
Saute the onion, bell pepper, and rice in a deep skillet until the onion is soft and the rice is just starting to turn brown. Add the rest of the ingredients (don't drain the can of tomatoes and can of chiles) and bring to a boil. Turn the heat down and simmer, covered until the liquid is absorbed. For white rice: cooking time will be about 30 minutes. For brown rice: cooking time will be between 50 minutes and 1:15. Tonight I tripled the recipe using brown rice and let it cook for about an hour and a half.
For spicier rice: Add cayenne and red pepper flakes with the rest of the spices and/or substitute jalapenos for the green chiles.
I think a nice finishing touch is stirring in some chopped cilantro when you're ready to serve it.
Wednesday, February 25, 2009
Apple Bran Muffins

I was in the mood for baking this week. Even though at the end of the day, my students' homework was still ungraded and I was complaining that my day got sidetracked, I had a batch of fresh muffins to show for it. The recipe is from "Cookwise" by Shirley O. Corriher which I was given by my friend Erika recently. While I'm just starting to read this book, I'm really enjoying her explanations of the science behind cooking and her clearly written recipes. I mostly followed the recipe but I adjusted the baking time (my muffins were done way earlier than she suggested at an even lower oven temperature) and I left out the 1 cup of chopped, toasted walnuts (I was sharing muffins with friends who are nut averse and wanted to make them toddler-friendly).
Apple Bran Muffins (makes more than 1 dozen)
1 1/2 c. oat bran (not wheat bran - bought it in the bulk section at Whole Foods)
3/4 c. unbleached all-purpose flour
1/3 c. nonfat dry milk (in the baking section - adds calcium to the muffins)
3/4 c. packed brown sugar
1 T ground cinnamon
2 tsp. salt
1 T baking powder
1 medium to large carrot grated (about 1 cup)
1 apple, peeled, cored & coarsely chopped (I used a Granny Smith)
Finely grated zest of 2 oranges
1 large egg
2 egg whites
1 cup buttermilk
1/4 c. canola oil
3 T canned crushed pineapple, drained
Preheat your oven to 425 degrees and prepare a muffin tin with non-stick spray, butter, or muffin liners. Combine oat bran, flour, dry milk, brown sugar, cinnamon, salt, and baking powder in a large mixing bowl. Work out any lumps (due to brown sugar) if necessary. Add the carrot, apple, orange zest and stir to combine.
Beat the egg, whites, buttermilk, oil, and pineapple in a medium mixing bowl. Pour the wet mixture into the dry mixture and stir to combine.
Spoon 1/3 c. muffin batter into each cup (just about to the brim). If you have extra batter, you can bake more muffins in a regular tin or make mini-muffins (like I did - my daughter loved these). The regular muffins will take 15-20 minutes and the mini-muffins will take 9-12 minutes to bake. Check them and take them out when the top springs back to your touch and looks golden brown.
What to do with your leftover canned crushed pineapple:
Pineapple Rice
Make white rice and when it's done, fluff it and stir in some crushed pineapple and chopped italian parsley. Good with teriyaki chicken, stir fry, steaks . . . just about anything.
Subscribe to:
Posts (Atom)