Showing posts with label dessert. Show all posts

Thursday, May 16, 2024

Spring Break Recap


Spring break started with a wonderful Resurrection Sunday with family and the next day, Jenna left for a mission trip to Mexico with her school.  The rest of us had planned a fun trip to Sonoma with family but Little got sick and our plans fell through.  It felt a little Covid reminiscent to have plans cancelled and be stuck at home without much going on but we tried to make the best of it.

While our house was cleaned, I took my sick baby & her sister to the park to read for some vitamin D.

Middle's spring break wish was to go to Hot Pot and we tried Shabuya which did not disappoint!

We made a Easter themed "dessert board" one night . . . I don't think you need a recipe but feel free to use this as inspiration for making a fun seasonal board.


Once Little was feeling better, she wanted to bake.  We busted out her mini cupcake maker and tried a new recipe.  You can still see in this photo that she wasn't quite herself :(   I picked these recipes because they were simple enough for her to make herself and all the ingredients were things we had on hand.  The end result was really good so I wanted to include the recipes here on the blog.


Vanilla Cupcakes with Lemon Buttercream Frosting
(makes 1 dozen)

For the cupcakes:

2 large eggs (room temperature)
1 cup granulated sugar
1/2 cup butter, room temperature
1 tsp. vanilla extract
1 1/2 cups all-purpose flour
1 1/2 tsp. baking powder
pinch of salt
1/2 cup milk

Line a muffin pan with cupcake liners and preheat oven to 350 degrees.  For best results with paper liners, double them up.

Using an electric mixer (we used a stand mixer), mix together the butter and sugar until creamy.  Add the eggs one at a time and then the vanilla.  Sprinkle in the baking powder and salt and stir.  Alternate adding the flour and milk and mix until combined - don't overman.

Divide the batter evenly in the cupcake liners and bake 17-20 minutes or until a toothpick in the center comes out clean.  Cool completely on a wire rack.

For the frosting:

1 cup unsalted butter, room temperature
4 cups powdered sugar
1/2 tsp. vanilla extract
4-5 T lemon juice
1 tsp lemon zest

Add the butter to a large mixer bowl and beat until smooth.  Add about half the powdered sugar and mix until smooth and well-combined.  Add the vanilla extract and 3-4 T of the lemon juice and the lemon zest and mix until combined.  Add the remaining powdered sugar and mix until well combined and smooth.  Add additional lemon juice as needed until it seems like the right consistency & flavor.  Frost the cupcakes once they have cooled completely.

Thursday, February 1, 2024

Pavlova

This week, our basketball season comes to an end - I love watching my girls play and in this house, we root for #25!  


Like I've said in previous posts, Middle's curiosity about new recipes has led us to some new favorites.  Both of my younger daughters really like the show "Bluey" (Disney+) and I find the family & sibling dynamics very relatable - definitely written by a parent.  In one episode, the sisters want to eat a pavlova so we talked about what a pavlova is and found a recipe to try.  

A pavlova is (from the bottom up), a layer of meringue, whipped cream, fruit, and sauce.  The first time through, there was a bit of a learning curve.  Middle learned why you use three bowls to separate egg whites, what "firm peaks" look like in a meringue, how to fold other things into your meringue, and how she prefers to have the meringues shaped.  The second time through, she did it 100% on her own with awesome results.  We just separated eggs for our third time making this recipe.  

It's delicious . . . we all loved it and it's actually a really simple concept with ordinary ingredients.  The contrast of textures is particularly enjoyable, in my opinion.

Recipe notes:  This whole process takes awhile - I didn't initially comprehend the part where it just sits in your warm oven for a long time.  Our first time, the meringue was still a little gooey in the center so depending on your oven, you may want to increase the temperature to 200 degrees.  The sauce yields quite a bit so you will have leftovers.  You can add sugar to sweeten your whipped cream, but we liked it with just some vanilla as a contrast to the sweet meringue and sweet sauce.  Any kind of berries will work on top - use what you like!

Pavlova (serves 4)
adapted from Ina Garten

First, make the sauce:

1 half pint fresh raspberries
1/2 cup seedless raspberry jam
1/4 cup sugar
1 T cointreau or framboise (optional)

Place the raspberries, sugar, and 1/4 cup water in a small saucepan.  Bring to a boil.  Lower the heat and simmer for 4 minutes.  Add the liquer if using and stir for about 1 minute more.  Pour this mixture into a food processor or blender and add the jam.  Process until smooth and then chill in the refrigerator until you're ready to assemble the pavlova.

Then, make the meringue:

4 extra large egg whites, room temperature
pinch kosher salt
1 cup white sugar
2 tsp. cornstarch
1 tsp. white wine vinegar
1/2 tsp. vanilla extract

Preheat oven to 180 degrees.  Place a piece of parchment paper on a sheet pan.

Place your egg whites and salt in the bowl of an electric mixer and using the whisk attachment, beat on high speed until firm, about 1 minute.  With the mixer on high, slowly add the sugar and beat until it makes firm, shiny peaks, about 2-3 more minutes.

Remove the bowl from the mixer and sift the cornstarch over the beaten egg whites.  Then, add the vinegar and vanilla and fold lightly with a spatula.

Pile the meringue in the middle of the parchment paper and smooth it into a disk, approximately 9 inches. We also sometimes make 5 or 6 small discs for individual meringues.  You want the top to be somewhat smooth and flat.

Bake for 1.5 hours.  Turn off the oven, keeping the oven door closed, and allow it to cool completely in the oven, about 1-1.5 hours.  It should be crisp on the outside and soft on the inside.

When you're ready to eat, make the whipped cream & assemble:

Whip 1 cup of cold heavy whipping cream in the bowl of a mixer with the whisk attachment or with a hand mixer.  When it starts to thicken, add 1 teaspoon of vanilla and beat until firm.

Spread the whipped cream on the meringue, top with berries and drizzle with the raspberry sauce.
 

Thursday, September 21, 2023

Cheesecake for the Birthday Girl


Well, my oldest daughter turned 16 this month!  The years have flown by . . . one of the best parts of this blog is that it's helped me document family life and my kids growth in one place.  I'm not consistent about journaling, scrapbooking or anything else like that and I'm grateful to have a space where I can look back and reflect.

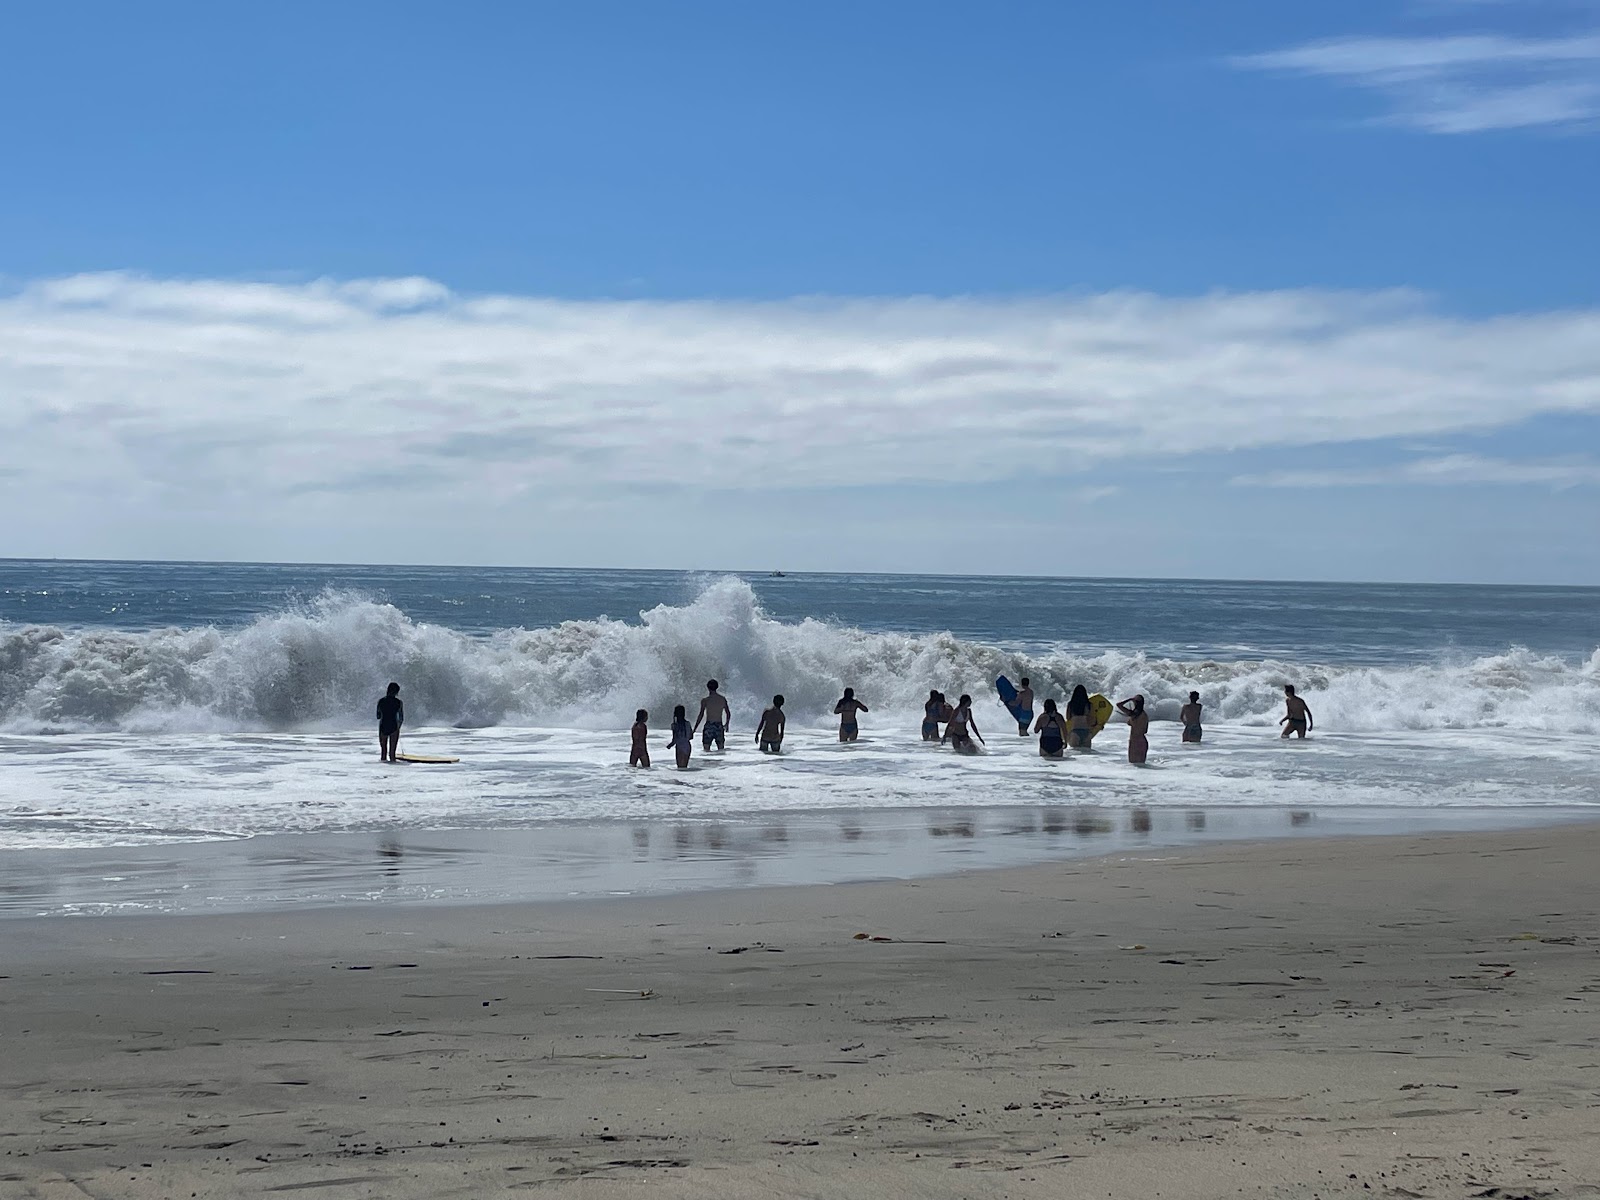
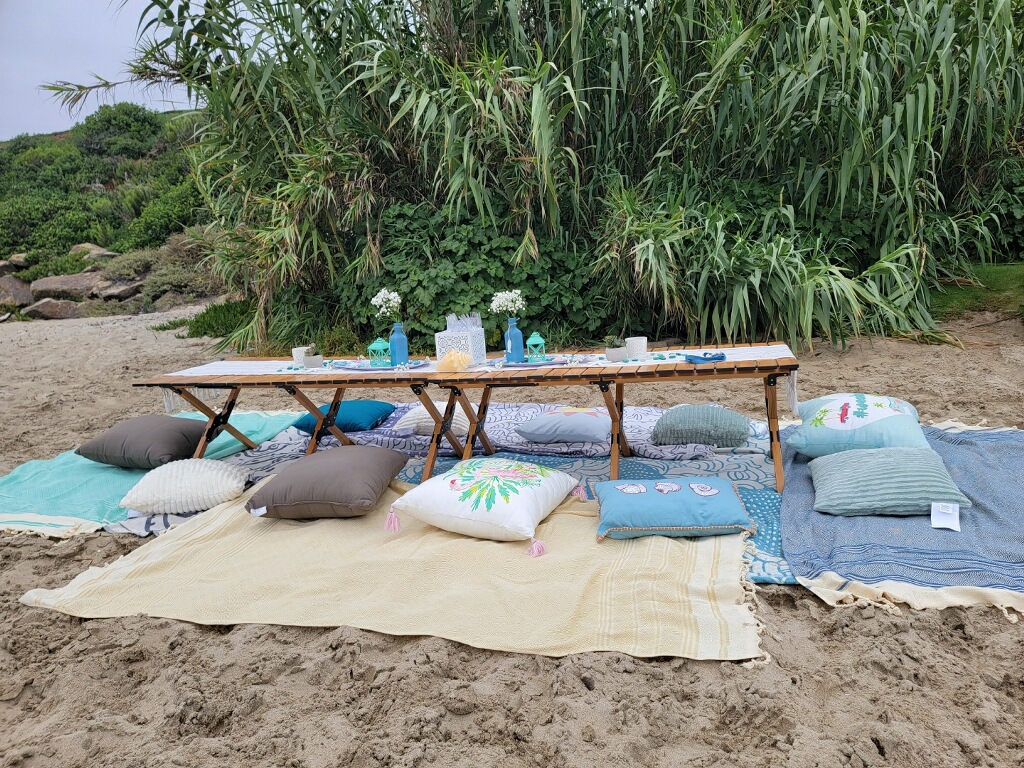
For her Sweet Sixteen, she wanted a day at the beach with her friend group and it turned out to be a blast.  From a picnic and pictures in sundresses to huge waves and a beach slip and slide, it was a memorable day that turned out (almost) like she had been planning.


The day before her birthday, we had a small celebration at home with friends & family and for her birthday dessert, she chose cheesecake.  I hadn't made one in awhile, but this recipe is tried and true and turned out great.  We had fresh figs on our tree so I made a fig sauce to go with it (and sliced strawberries for the people who aren't fig fans).

Recipe notes:  It takes a LONG time so plan ahead.  The link below to the original recipe has a lot of troubleshooting information (cracks, water bath, underdone cheesecake).  I leave off the sour cream topping but if you want to make that, again look at the original recipe.

Happy birthday sweet girl!  Your mama loves you :)

Perfect Cheesecake
recipe from Simply Recipes

Ingredients:

Crust - 1 3/4 cups graham cracker crumbs (about 15 graham crackers)
            2 T sugar
            pinch salt
            5 T unsalted butter, melted

Filling - 2 lbs cream cheese, at room temperature
              1 1/3 cups sugar
              pinch salt
              2 tsp vanilla extract
              4 large eggs, at room temperature
              2/3 cup sour cream, at room temperature
              2/3 heavy cream

To prepare the crust, preheat the oven to 350 degrees.  Pulse the graham crackers in a food processor until finely ground.  Put in a large bowl, stir in the sugar and salt, and stir in the melted butter.

In a 9 inch springform pan, press down the crumbs into an even layer.  I used a measuring cup to help press the crumbs down and give a little bit of an edge going up the pan.

Bake for 10 minutes, remove from oven, and let the crust cool.  While the crust cools, you can lower the oven temperature to 325 degrees and put your oven rack on the bottom of the oven.  Then, start making your filling.

Beat the cream cheese in a stand mixer with the paddle attachment on medium speed for 4 minutes or until soft, smooth, and creamy.  Add the sugar and beat for 4 minutes more.  Add the salt and vanilla, mixing until just incorporated.  Reduce the speed to low and add the eggs, one at a time.  Scrap down the bowl paying attention to any thicker bits of cream cheese that may have stuck to the bottom of the mixer.  Add the sour cream on medium speed and mix until incorporated.  Change the mixer to low speecd and add the heavy cream.

Once the pan is cool, wrap it in a triple layer of foil.  Boil some water in a kettle to prepare your water bath.

Scrape the filling into the crust, place the springform pan (wrapped in foil) in a large roasting pan, and carefully add water to the pan so that it goes about halfway up the side of the springform pan.  Place the roasting pan in the oven.  

Bake at 1 1/2 hours at 325 degrees.  Then, turn off the oven and crack the oven door and let it sit there for another hour.  After that, cover the top of the cheesecake with foil (don't let the foil rest on the cheesecake - make a tent), and chill in the refrigerator for a minimum of 4 hours (overnight is fine).

Serve with toppings of your choice - we like whipped cream and some sort of fruit.

Thursday, April 20, 2023

Spring Break Fun (Food from Instagram Part III)

We had an absolute blast during spring break with a trip to Florida.  We started planning a few months ago and the girls wanted to go somewhere they had never been before.  Disneyworld has always been on my list of places that I wanted to take them but I didn't really want to go with a toddler or kid who was too young to really enjoy it (or keep up!).  I'm so glad I waited - they were the perfect ages for it and such great travelers.  We began our trip in St. Petersburg on the gulf coast and ended it with some time in Reunion FL with our cousins from Connecticut.  In the middle, we did 3 days in the parks (1 day for my husband) and I put Big in charge of our itinerary, the Genie + / Lightning Lane situation, eating plans etc.  I joked that I just wanted to follow behind with the credit card and in the end, it took a lot of pressure off and made it so much more fun.  She did an awesome job.  I took so many photos but here are just a few. . .

Key Lime Pie in FL

Art festival in St. Petersburg

Dairy Free Milkshake!

This restaurant brought us fresh cotton candy after our meal

World's Largest Sundial

Warm Gulf waters - Pass-a-Grille Beach

Epcot Day 1 - flower festival topiaries were amazing!

My goal was to eat a Dole Whip every day . . . 

Ratatouille Ride

Disney Bounding on Day 2 - Cinderella, Rapunzel & Belle

Fun with Family


Disney Bounding on Day 3 - Tink, Eeyore, and Alice

It rained :(

Reunion with Aunt Janelle


In other spring break fun, we tried another Instagram recipe for Peep Rice Krispy Treats.  Big didn't like them but the rest of us did - you could combine or mix colors / styles of Peeps.  We found we had to increase the amount of Rice Krispies when we stirred it up because it was too marshmallow-y.

Peep Rice Krispy Treats (makes 9)

15 peeps (1 package)
3 cups Rice Krispies
3 T butter

Put the peeps in a greased 8x8 pan.  Pour the Rice Krispies over.  Top with slices of butter.  Bake in a 350 degree oven for 5-10 minutes or until the marshmallows are melty.  Stir to combine.  Add more Rice Krispies if necessary.  Pat down.  Let cool before serving.


Thursday, April 8, 2021

Blueberry Ice cream

We haven't made ice cream in ages but we've consumed more than ever during the last year #thankscovid19.  I was making a lemon bundt cake last weekend and thought that blueberry ice cream would go well with it.  The recipe is super simple but it was delicious.  

Blueberry Ice Cream

from Taste of Home

4 cups blueberries

2 cups sugar (or less depending on how sweet your berries are)

2 T water

4 cups half-n-half

Combine the blueberries, water, and sugar in a large saucepan on the stovetop and cook until the sugar is dissolved and the blueberries are softened. Transfer to a food processor or high quality blender and blend until smooth.  An optional step is to strain the mixture to remove the skins.  My Vitamin blender got it pretty smooth, so I didn't do this step.  Refrigerate until cold.  Mix with the half and half and put it in your ice cream maker.

Friday, December 28, 2018

Non-traditional holiday dessert

Thanksgiving 2018
This year, we didn't have a traditional family Thanksgiving and we celebrated Christmas early with only one of my siblings since my sisters weren't able to come home this year.  Just the 5 of us were in Palm Desert for Thanksgiving.  While we had a wonderful day and made some new family memories (including turducken which we will definitely repeat!), the kids were disappointed not to be with cousins and extended family.

Our dessert choices reflected our non-traditional year . . . no-one really wanted apple pie or pumpkin pie so I made this gingerbread pumpkin dessert and Big made a new recipe - a lemon lava cake.  Big loves lemon desserts, is really into baking lately, and came up with this idea.  We read several recipes online before determining that we didn't want one that was mostly white chocolate.  A lot of these take a chocolate lava cake and use white chocolate and lemon instead.  What we came up with turned out delicious . . . especially with some of our orange cranberry sauce from Thanksgiving dinner on top!  In the future, we thought of incorporating fresh blueberries or a blueberry sauce as well.

Recipe notes:  You can make your own lemon curd, or buy it.  We used the Trader Joe's one.  These amounts are little funky because I was converting from metric weights.


Lemon Lava Cakes (makes 6)
from Seasons and Suppers blog

7 T unsalted butter, softened (plus more for greasing the ramekins)
5 T white sugar (plus 1 T for dusting the ramekins)
2 eggs
2 T whole milk
1 tsp lemon zest
3/4 cup + 1 T all-purpose flour
6 T lemon curd

Preheat oven to 400 degrees.  Butter six ramekins and coat them with white sugar.  Set aside.

In a large bowl, beat the butter and sugar until fluffy.  Lightly beat the eggs and gradually add them to the bowl, beating all the time.  Add the milk and lemon zest.  Add the flour and incorporate well.

Fill each ramekin about 1/3 full of the batter.  Using a spoon, make a little well in the middle by pushing the batter away from the middle to the sides.  Place about 1 T of the lemon curd in the well you made, then cover the curd with more batter until the ramekin is 2/3 - 3/4 full. Repeat with remaining ramekins and place filled ramekins on a baking sheet.

Bake for 15-20 minutes or until the tops are golden and the cakes spring back when touched.  When you remove them from the oven, immediately run a knife around the edges of the ramekins before turning them out on to plates.  Serve right away.

Friday, August 10, 2018

Cooking Class


I've attended many cooking classes but I've never taught one myself.  This was very informal and more of a way to entertain 5 girls in a condo for an entire day with one of their favorite activities.  I asked my girls and their two friends to give me a list of things they wanted to make or learn to make and then we had to pare it way down.  The menu they handed me looked like this:

Appetizers:  Salsa and Chips
Main Course:  Lasagna
Side Dishes:  Salad, Chicken kebobs
Dessert:  Coconut Cookies and Vanilla cake with marshmallow mousse, butter cream frosting, and candy

I had some equipment issues (mainly that I have no mixer and one oven) so we adjusted the dessert to coconut bars and chocolate marshmallow fudge,  but I left the rest of the menu the same.

Our 4 main concepts were mis en place (the French phrase for having everything in its place and ready to use before you begin cooking), reading recipes, cleaning as you go, and timing.  I told them the main challenge of cooking a meal as opposed to one dish is timing everything so that it's done at the right time and you don't need to have multiple things in the oven at one time.  Originally, I planned to do the chicken kebobs in the oven since I don't really grill, but they wanted to grill so J took over that part and gave them a little grilling lesson while the lasagna was in the oven.


A couple of my take aways from the day . . .
* Kids really will eat things that they themselves help to make.  It might only be a bite, but they will try new stuff
* Some of the basic ideas that we have known for a long time (which "tool" will work best for the job, how to measure dry vs wet ingredients) are new and need to be explained very simply
* I should trust my kids to do more cooking at home on a regular basis

We made 6 recipes in 8 hours and honestly, all of it turned out delicious.  It was a lot of cleaning all day (the floor, the counters, washing pots), but totally worth it.  They all had a blast and felt really proud of their efforts at the end of it.

Here's one recipe I'd like to share . . . it was a new one to me and turned out so good.  My husband said he's prefer this to brownies.  They are like a coconut blondie and the texture and flavor was just perfect.

I'll post more of our recipes from that day in a future post.


Chewy Coconut Bars (makes a 9x9 pan)
from Cookies and Cups blog

1/2 cup butter
2 cups light brown sugar
2 eggs
2 tsp vanilla
1/2 tsp kosher salt
1 tsp baking powder
1 cup flour
1.5 cups sweetened flaked coconut

Preheat oven to 350 degrees.  Line a 9x9 pan with foil and coat with nonstick baking spray.

In a medium saucepan, melt butter over medium low heat.  Once it's melted, continue cooking until it comes to a boil and starts to brown, stirring constantly so the butter doesn't burn.  Reduce heat slightly and cook until the butter is an amber color.  Remove from heat and stir in the brown sugar until completely combined (it won't dissolve).  Using a rubber spatula, stir in the eggs, vanilla, and salt.  Then, stir in the baking powder and flour and stir until fully incorporated.  Last, stir in the coconut.

Pour the batter into the prepared pan and bake until golden.  The edges should pull away from the pan and look crispy and the center will be barely set.  The original recipe said 20 minutes but this took me closer to 35.  After 20 -25 minutes, check it every 5 minutes or so.  Cool completely before slicing into bars.

Wednesday, May 31, 2017

Blood Orange Sorbet

 It's almost summer vacation! We started out with a chain this long (27 links) a few weeks ago and now we're down to 8 links.
We had Open House at the girls' school and Mother's Day & Father's Day events in both preschool and kindergarten.  I went with Middle to her last field trip of the year and took Big to visit family and friends in the Midwest.  It seems like now the To Do lists are in full effect . . . everything I need to do to finish up my quarter at work, to get ready for 2 months away, and to get through the last two weeks of the school year with the girls.  It's exciting!


One of the almost summer things we've been doing is using our ice cream maker.  I found David Lebovitz's method for sorbet (link below in the recipe) and I'm sold.  I usually make a simple syrup adding water to the sugar but with his technique, the flavor and texture was outstanding.  I think it's the lack of water and/or the addition of a couple tablespoons of champagne.  Serving sorbet with champagne is always a good idea but adding it to the mixture is something I haven't tried before.  These ratios and the method will work for other fruits / citrus as well.  Two additional notes:  Lebovitz doesn't strain his juice and I recommend tasting the sweetness of your juice and adjusting the sugar amount slightly.  My juice was really sweet so I used less sugar than what it says below.


Blood Orange Sorbet
from David Lebovitz

Ingredients:

Blood oranges
Sugar
Champagne or sparkling wine (optional)

Method:
1.  Juice your oranges and measure the juice
2.  For every 1 cup of juice, add 1/4 cup of granulated sugar
3.  Put the sugar in a small saucepan and add enough juice to saturate the sugar.  Heat over medium heat, stirring constantly, until sugar is dissolved.  Remove from heat.
4.  Add the liquid with the dissolved sugar to the rest of the juice and place in the refrigerator until chilled.  Optional:  When completely chilled, add 2 tablespoons of champagne or sparkling wine per cup of juice mixture.
5.  Freeze according to your ice cream maker's instructions.

Thursday, February 25, 2016

Meyer Lemon Souffles

Family dinner birthday cake with my girls
12 kids between us . . . how did that happen?      


So, I turned 38 two weeks ago.  Age and numbers are so strange sometimes.  I look in the mirror and I know I'm getting older but I don't feel 38 at all.  Two days before my birthday Little got sick - fever, sniffles, laying on the floor completely listless.  I was sad for her and a little sad for me and having to reschedule plans but on Friday night, we sent Big & Middle to their Friday night drop off anyways and after putting the sick baby to bed, I made myself a birthday dinner.  My husband and I learned long ago that going out to eat on Valentine's weekend (aka my birthday weekend) is not always a great experience.  Before we had kids and when they were very young, we'd cook an elaborate and fancy dinner at home instead, working together in the kitchen.  Resurrecting this tradition (with our only kid at home asleep) was really fun this year and I made a couple of new things.  Stay tuned for the risotto . . . 

I still had Meyer lemons and decided to make souffles for dessert.  You may need to adjust the recipe below for cooking time if you use big ramekins like I did but the recipe will yield enough for 6 small ramekins.  I forget how easy and satisfying souffles are and it was nice to have a different treat from cupcakes and cakes.  Not that I didn't appreciate them but I ate. too. much. cake.  My mom made me an awesome birthday cake for family dinner and my BFF bought Valentine's cupcakes on my actual birthday.  Did I mention that party?  It was going to be me, 3 of my girlfriends and our families.  We ordered pizza, drank wine, ate the cupcakes and had a really fun evening.  But when we lined up the kids for that photo above, it was amazing to see how some friendships between girlfriends have now grown to include 15 kids - one friend and her 3 kids weren't there :(.  I also got to see my two best childhood friends that weekend and have a rescheduled adult birthday dinner with my parents and all my siblings - I feel loved and celebrated!

One more recipe note:  If you've met my husband, you know he always has great ideas for improving any recipe.  I didn't make any sauce to pour in the souffles so he mixed together some lemon juice, simple syrup, cointreau and maybe a little brandy and poured it in the middle . . . it was divine!  So, you may want to make a sauce to go with these.


Meyer Lemon Souffles (serves 6)
from Sunset 3/97

1/3 cup Meyer lemon juice
2 tsp. finely grated lemon peel
4 T butter (plus more to butter the ramekins)
1/4 c. flour
1 cup half n half
2/3 cup granulated sugar, divided
 6 large eggs, separated
1/4 tsp. cream of tartar
Powdered sugar for serving

Begin by buttering your ramekins and coating with granulated sugar.  Once they're prepared, stick them in the refrigerator.  Preheat oven to 375 degrees.  

Melt 4 T butter in a small saucepan over medium heat.  Whisk in the flour, then half and half, and then 1/3 cup sugar.  Whisk constantly until the mixture comes to a boil and then boil for 30 seconds before removing from the heat.  Use a little of this hot mixture to temper your egg yolks and then incorporate egg yolks and 1/3 cup Meyer lemon juice, and lemon peel.  Pour this mixture (it'll resemble a custard or lemon curd) into a large bowl and let it cool slightly while you beat the egg whites.

In the bowl of a mixer, beat the egg whites and cream of tartar until soft peaks form.  Beat in 1/3 cup sugar, 1 tablespoon at a time, and continue to beat just until the egg whites hold glossy straight peaks when you lift the beaters.  I like to use the whisk attachment of my stand mixer and I take the whisk off to check the stiffness of the egg whites.

Stir about one cup of egg whites into the lemon/yolk mixture.  Then, very gently fold the remaining egg whites into the batter until you can barely see any white streaks.  Do NOT overmix at this point.

Scoop into prepared ramekins, filling them almost to the edge.  Bake at 375 degrees for 12-13 minutes.  The souffles should barely ripple in the middle if you gently shake them. This will give the souffles a creamy texture.  If you like a drier or stiffer texture, you can bake a few additional minutes.

Serve warm with a little powdered sugar dusted on top!

Tuesday, December 22, 2015

Gingerbread

The holiday season!  We're having such a fun time and the delight that the girls have in the sights, sounds, and events of the Christmas season has made it so enjoyable.  We wish you a Merry Christmas and a Happy New Year!

My girls were both angels at the preschool Christmas program

Hot chocolate with candy canes by the fire- doesn't get much better! 

Crazy hair & Christmas PJ day at school
Still not too big for a chat with Santa Claus!
Took the big girls to their first "real play" at the Pasadena Playhouse
My cookie helper! 
One of my most favorite holiday flavors is gingerbread - gingerbread cookies, gingerbread lattes, gingerbread itself.  I made this gluten free gingerbread for Christmas last year with my family and served it with whipped cream and it was good.  I'm going to make it again this year.


Gluten Free Gingerbread

Pamela's classic vanilla cake mix
1 cup vegetable oil
1 cup molasses
2 T crystallized ginger
2 large eggs
1 T ground ginger
2 tsp. cinnamon
1/4 tsp. cloves
1/4 tsp. salt
1 cup water
1/2 tsp. baking soda

Preheat oven to 325 degrees.

In a large bowl, whisk oil and molasses together.  Add eggs and ginger and combine well.  In a medium bowl, combine Pamela's classic vanilla cake mix, spices, and salt.  Add to the larger bowl and mix until throughly combined.

Bring 1 cup water to boil.  Add baking soda and mix.  Add to larger bowl until just combined.   Pour into a lightly greased 9x13 inch pan and bake for 35-40 minutes, until a toothpick comes out clean.

Let cool; cut into squares and serve with whipped cream or ice cream.