Sunday, January 29, 2012

Spanish Rice in the Crockpot


My cousin has a cooking blog and I always look forward to reading what she's made on Tuesday nights.  She's a great cook, way more daring than I am (check out her mad bread making skills).  In one post, she reminded me of  the spanish rice in the crockpot that my grandma and mom used to make.  I have my own homemade (that is, not from a box with a seasoning package) version of this, but the crockpot is really convenient sometimes.

This past weekend I made a crockpot of Chipotle Carne Asada and a crockpot of the rice.  However, I  made a bit of a mistake . . . I used Thai Jasmine rice instead of a regular long grain rice and it got sort of mushy.  But, I added some spices to the family recipe and really liked the overall flavor.  I used 2.5 cups of rice and 5 cups of liquid and it made a crockpot full . . . we had 20 guests and I had tons of leftovers (maybe because it was so mushy??)

Spanish Rice (6 side dish servings)

1.5 c. raw long grain rice
1/4 c. olive oil
1.5 c. tomato juice (I used low-sodium V8)
1.5 c. water
1 small onion, chopped 
1 small green bell pepper, finely diced
2 tsp. chili powder
1 tsp. ground cumin
1/2 tsp. ground chipotle pepper (or paprika or for a kick, 1/4 tsp. cayenne)
1/2 tsp. salt

Saute the rice, onion, and bell pepper in the olive oil until the rice is golden brown and the onion & pepper are soft.  Put it in a crockpot with the rest of the ingredients.  Stir well.  Cover and cook on low.  My cousin's instructions say low for 4-6 hours or high for 2-3 hours.  My crockpot is notoriously hot / fast and I checked it when the liquid was absorbed at about 2 hours on low and it was done.   

Tuesday, January 24, 2012

Southwest Stuffed Peppers

Ok, sorry . . . these cell phone photos aren't the best but you get the idea :)


I love stuffed peppers.  My usual recipe is this one, a vegetarian version with Israeli cous cous.  I'm also a fan of the traditional ground beef, rice, tomato sauce kind but those aren't my husband's favorite.  This week I tried a new version.  The lean ground turkey and brown rice make for a filling and low-calorie option and the southwest flavors were great.  I think they're my new favorites and will go into regular rotation around here. 

Recipe notes:  By using pepper halves and the technique of hot water / foil tenting, you avoid having to boil or roast the peppers first.  To make these vegetarian, substitute pinto beans, black beans or chick peas for the ground turkey.  The cilantro is great and if you like spicier, add some diced jalapeno or other green chile when you add the onion & garlic.  Remember that the recipe uses cooked brown rice, so plan ahead.

Southwest Stuffed Peppers (serves 4)
Original recipe here

1-2 tablespoons extra virgin olive oil, as needed
1 lb ground turkey
3-4 garlic cloves, chopped
1 medium red onion, diced
1 cup cooked corn kernels (I used canned but you can thaw frozen corn or use fresh as well)
1 cup or so cooked brown rice
Chipotle powder, to taste [or other favorite chile spice]
1/2 teaspoon cumin, or to taste
1 teaspoon paprika or smoked paprika
Sea salt and fresh ground pepper, to taste
2-3 tablespoons fresh chopped cilantro
4 medium bell peppers, halved and seeded (I used red & yellow)
some jarred salsa
some shredded cheese (or goat cheese)
Preheat your oven to 375 degrees. Heat a little olive oil in a large skillet over medium heat and cook the ground turkey till browned; drain off any liquid, if you need to.

Add a dash more olive oil; heat; add the chopped garlic, onion, and corn; stir and heat through.

Add a cup of cooked brown rice, stir and lightly mix. Add a dash more olive oil, if needed, to moisten. Add chipotle, cumin and paprike. Season with sea salt and pepper. Stir well to combine the flavors. Remove from heat. Add in the chopped cilantro. If you need a little more rice to fill large peppers- add some in and toss.

Choose a shallow baking dish that will fit the halved peppers. Stuff the halved peppers with the brown rice mixture, pressing in firmly; use as much stuffing as you can. Place the stuffed peppers in the baking dish.

Top each pepper with a spoonful of salsa, and  some cheese, if using.

Pour about an inch of hot boiled water into the bottom of the baking pan, around the peppers, and loosely cover the pan with a foil tent. This helps to cook the peppers. Bake in a 375 degree oven for about 25-35 minutes, until the peppers are fork tender.

Friday, January 20, 2012

Around the dinner table


Do you eat dinner at the table, with the TV off, as a family?  Did you do that growing up?  Most of my life, we sat down to the table as a family, ate a homemade meal, talked, laughed, and we all stayed at the table until dinnertime was over.  I remember at one point there was a star chart where we got a star for all staying at the table and not getting up for anything . . . I think after weeks and weeks, the reward was our pet bunnies.

As a parent, I have a new appreciation for what my mom did to make all those meals and the effort it takes to get a family to all sit at the table.  I know I've written before that planning is half the battle, but it's also the little things like buckling squirmy Little into a booster seat (which she's not a fan of) to help her get into the habit of family dinner and not giving in to the temptation to feed the kids at the counter and then eat our own quiet dinner at 8pm when they're in bed.  We do this sometimes, but I don't like it to be our norm that the kids and adults eat separately.

This quarter I get home from work at about 7pm on Mondays and Wednesdays.  We've mostly been eating soup & salad or leftovers on those nights but I got the bright idea of putting Big & Daddy up to the task of cooking together.  Their first endeavor was homemade pizzas; dinner was delicious and I loved coming home and not having to cook!  One thing that recently reinforced my commitment to the family dinner table was an article by Mark Hyman on the Huffington Post. It's common sense that you'll save money and gain less weight if you cook your own food at home but there are other advantages that are pretty cool.

For you parents out there, here's an inspiring excerpt:  "Research shows that children who have regular meals with their parents do better in every way, from better grades, to healthier relationships, to staying out of trouble. They are 42 percent less likely to drink, 50 percent less likely to smoke and 66 percent less like to smoke marijuana. Regular family dinners protect girls from bulimia, anorexia, and diet pills. Family dinners also reduce the incidence of childhood obesity. In a study on household routines and obesity in U.S. preschool-aged children, it was shown that kids as young as four have a lower risk of obesity if they eat regular family dinners, have enough sleep, and don't watch TV on weekdays."

Monday, January 16, 2012

Lamb & Zucchini Casserole


Ok, Martha Stewart calls this recipe a lasagna and although I guess lasagnas are technically casseroles, without cheese between the layers (or any pasta), I had a hard time selling this to my family as lasagna.  It was delicious and I'll be enjoying the leftovers and making it again soon.  I liked how the zucchini was roasted first and it still held it's shape and texture by the time the whole casserole was baked.

I made it ahead of time (naptime) and baked it at dinner time.  If you want to make it more lasagna-like, I might add feta (or ricotta) between the layers.  If you are like my mom and consider lambs to be friends, not food, substitute lean ground beef or ground turkey.  The fresh oregano made the recipe (in my opinion) and the nutrition information is pretty decent for a hearty dish like this - about 500 cal/serving.

Here's a photo of the first two layers:


Lamb & Zucchini Casserole (serves 6)
from Martha Stewart's Everyday Food

2 teaspoons extra-virgin olive oil, plus more for baking sheets
5 medium zucchini, cut lengthwise into 1/4-inch slices
Coarse salt and ground pepper
1 yellow onion, diced small
2 garlic cloves
1 1/4 pounds ground lamb or beef
1 tablespoon tomato paste
2 large tomatoes, diced large
1/4 cup fresh oregano leaves
10 ounces part-skim ricotta (1 cup)
1/2 ounce Parmesan, grated (2 tablespoons)

Preheat oven to 425 degrees. Brush two rimmed baking sheets with oil. Divide zucchini between sheets; arrange in a single layer, turning once to coat. Season with salt and pepper; roast until softened, 15 minutes.

Meanwhile, in a large skillet, heat oil over medium-high. Add onion and cook until softened, 8 minutes. Add garlic and cook until fragrant, 30 seconds. Add lamb and cook, breaking up meat with a spoon, until browned, 6 minutes. With a slotted spoon, transfer lamb to paper towels to drain and pour off fat from skillet. Return lamb to skillet; add tomato paste, tomatoes, and oregano. Stir to combine. Cook until tomato liquid is almost evaporated, 10 minutes. Season with salt and pepper.

Reduce oven to 400 degrees. Spoon half the lamb mixture into an 8-inch square baking dish. Top with half the zucchini slices, overlapping to fit. Repeat layering with remaining lamb mixture and zucchini. Spread ricotta over top; sprinkle with Parmesan. Bake until sauce is bubbling and cheese is browned in spots, 20 to 30 minutes. Let cool 10 minutes before serving.

Friday, January 13, 2012

Chicken, Mushroom & Brown Rice Casserole


People can be divided into two camps:  those who enjoy a good casserole and those who are skeptical of anything resembling a casserole.  My girls are the suspicious type (they like all the parts of their meal separated) and my husband and I are the first type (even though we have a relatively high bar).  Casseroles remind me of church suppers and bringing (or being brought) meals when a baby is born or someone is sick. 

It seems like casserole recipes of this sort usually rely on condensed soup to hold it all together.  I liked how this was just sour cream, cheese and broth.  For a casserole, the lean protein, brown rice, and vegetables make it a relatively light option.  You could probably add zucchini, celery or other vegetables to the beginning of the recipe and I bet wild rice would work as well as brown rice if  you had that handy.  Also, if you wanted to lighten it even further, you could omit the last cup of cheese on top (but that part was especially yummy!).  Bonus:  It's gluten free, you can make it ahead of time (see note at end) and I used a rotisserie chicken which made this super quick to put together.  Just take into consideration the cooking time of the brown rice (or you could use the already cooked brown rice from Trader Joe's).

For those of you who like casseroles, here are a couple of other options on the blog:
Chicken and wild rice casserole
Sherry lamb casserole
Chile relleno casserole
Sue's egg casserole
Puffy egg casserole


Chicken, Mushroom, and Brown Rice Casserole (serves 6)

2 c. cooked long grain brown rice
16 oz mushrooms, washed, thickly sliced, slices cut in half
1 onion, diced
1/2 cup diced carrot
2 tsp. ground thyme
1/2 tsp. poultry seasoning (I used a lemon herb one from Williams Sonoma)
1.5 - 2 c. diced cooked chicken (or turkey)
1/2 c. chicken broth
1/2 c. low fat sour cream
1/2 c. coarsely grated parmesan cheese
2 c. grated low-fat cheese (I used a cheddar jack blend) - divided
salt, pepper and olive oil

Cook brown rice according to package directions and let it cool.  Preheat oven to 375 degrees.  Heat 2 teaspoons of olive oil in a large non-stick pan and sauté the mushrooms until they're starting to brown and all the liquid has evaporated.  Remove them to a dish.

Add the onions and carrot to the same pan.  Add a little more olive oil and sauté 4-5 minutes or until the onion has softened.  Add the thyme, poultry seasoning, some salt and pepper, and sauté about 2 minutes more.  Turn off the heat and add the chicken, mushrooms, and rice (if your pan isn't large enough, combine the vegetables, chicken and rice in a large bowl).  Gently stir until all the meat and vegetables are evenly distributed in the rice.

In a small bowl, whisk together sour cream and broth.  Then stir in the parmesan cheese and 1 cup of the grated low-fat cheese.  Gently stir the sour cream mixture into the rice mixture.  Spray a 2 quart casserole dish with non-stick cooking spray (or brush with olive oil).  Spoon the rice mixture into the dish and press down to evenly distribute.  Bake for 25 minutes or until casserole is slightly bubbling and barely starting to brown.  Sprinkle with the second cup of cheese and bake about 15 minutes more.  Serve hot.

Make ahead:  I made it up to the point of putting it in the oven and refrigerated it.  Then, I added 5-10 extra minutes to the baking time.

Tuesday, January 10, 2012

Young Chef's Academy

About 6 months ago, I bought a Groupon for the Young Chef's Academy in Claremont.  We had walked by several times and big sister loved the idea of taking a class.  The class times aren't very convenient for us so it took the Groupon almost expiring to get us in the door (finally). 

Chef Tony was awesome and even put on a chef's hat when he saw that my daughter was disappointed that he wasn't wearing one (in the photo, you can see he also let her wear one too). The kids made Chicken Noodle Soup and a Four Cheese and Tomato Panini.  Here's my honest review of the experience:

Pros
Fun . . . Big loved it
Friendly, personable staff
Recipes for students to take home - Big is excited to make this menu again for Daddy and little sister
Got my daughter to eat some stuff she usually doesn't eat (tomatoes, soup)

Cons
Most of the cooking that the kids did was just chopping.  Not sure if that's because of this menu in particular or if that's characteristic of the classes for her age.
No stove in the kitchen - made me think I'll steer clear of their adult classes
The class is "parent participation" but the parents didn't participate.  I loved doing something new with Big and watching her but I think it should either be optional to drop them off or encourage more actual participation from parents.

They do birthday parties which I think sounds like a lot of fun.  Check them out here or at 514 W. First Street, Claremont (in the Packing House).

Thursday, January 5, 2012

Quinoa Salad


In the summertime I made a quinoa salad with mango and black bean and this sort of reminded me of that.    About 6 months ago, someone at church made this for potluck and I walked around to the tables to find out who made it so I could get the recipe.  Turns out, it's from the back of the box of Trader Joe's organic red quinoa.  

One of my New Year's resolutions is to feed my family better and to make meals we can all eat (instead of an adult meal and a kid's meal).  I served this quinoa salad with baked turkey taquitos (idea from here if you want a recipe).  The girls liked parts of the quinoa salad not mixed together (a little avocado, some black beans, some corn) but I still only made one dinner for all 4 of us!

The dressing is the bottled cilantro dressing from Trader Joe's but if you don't live near a TJ's, you can try the homemade version after the salad recipe.

Black Bean, Roasted Corn and Avocado Quinoa Salad (6 side dish servings)

1 cup quinoa
2 cups broth (chicken or vegetable)
1 15oz can black beans, drained and rinsed
2 cups roasted corn kernels (I used thawed frozen corn)
1 avocado, cut into 1/2 inch pieces
1 pint grape tomatoes, halved
1/2 c. red onion, finely diced
3/4 cup cilantro salad dressing
1/2 bunch cilantro, chopped
zest of one lime
salt and pepper

Place quinoa and broth in a saucepan and bring to a boil.  Reduce to a simmer, cover and cook until all water is absorbed, about 10 minutes.  Set aside to cool.  

Combine quinoa, black beans, corn, avocado, tomatoes, onion, half of the cilantro and the salad dressing in a bowl.  Stir in lime zest and salt and pepper to taste.  Add more dressing if you want to.  Garnish with the remaining cilantro.

Cilantro Dressing (or marinade)

Combine the following ingredients in a blender, mini chopper, or food processor:

1/4 cup olive oil
1/4 cup chopped fresh cilantro
2 tablespoons chopped fresh mint
2 tablespoons white wine vinegar
1 tablespoon fresh lime juice
1 garlic clove
Salt and pepper


Tuesday, January 3, 2012

And, back to real life . . .

I love the holidays - everything about them and this year, it went by way too fast for my taste.  Even though the decorations and holiday food are gone (well, I still have half a box of peppermint Joe Joes), I still can't believe it's over.  Before I move on in 2012, I want to share a few of our holiday photos.  

17 month old little sister = Christmas tree outside this year.  Big sister was the chief Tree Trimmer and Star Placer.

Even though I'm super challenged when it comes to rolled out cut out cookies, we did our best.

Big took some cookies to her favorite neighbors along with a picture that says "God and Jesus Love You."

Sants's little elf

A new bike so Big can be just like Daddy!

Little got a "beep beep."  I think she'd sleep in it if I let her!

Many attempts at a picture of the two of them together and this is about as good as it gets. 


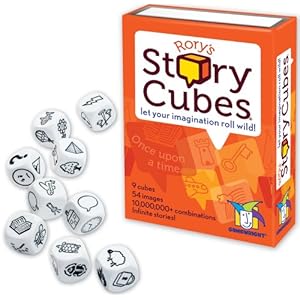
I'll save any unposted holiday recipes for next year and instead give you a review.  You know I love games and I have to tell you about two that I got for Christmas:  Rory's story cubes and Spot It.  


I've seen both around, and even given them for gifts but and I finally have them for our family and have had a chance to play them.  What's fun is that they work great for groups of adults but I also spent about an hour playing both with big sister while little sister napped yesterday.  Great game concepts and I know we'll spend a lot of time with both of them.  Bonus:  they are small enough to tuck in your purse.

I also got a Kindle which I'm super excited about . . . I'd love to hear any suggestions for favorite books!

Happy 2012 to you all . . . may the upcoming year be blessed for you and your loved ones!