Thursday, April 20, 2023

Food for Some of the People

Recently I wrote about that dreaded question: "What's for dinner?"  and last weekend I came up with a new recipe that went over well with some of the people.

Since I've been staying home from work this year, we eat dinner together at home about 5 nights a week.  Usually one weekend night and one weekday night we'll either go out to eat or to a friend's house or something.  Of those 5 nights a week, often we have 1 where one of the kids is missing (at a friend's or an activity).  I've been trying to embrace that by cooking the thing that particular kid doesn't like to eat.  For example, if Big is gone, I'll typically make a pot of soup or stew or if Middle is gone, I'll make salmon.  

One of those nights happened last weekend and I made a new salmon recipe that I had been wanting to try.  It was a big hit and in particular, this would be great on a weeknight because it came together and cooked so quickly.  I made some modifications to the slaw (recipe below is what I made) and I kept the jalapeños sliced so that Little could pick them out.  The original recipe also calls for a cast iron skillet which I didn't use but I bet you could make this on the grill in a cast iron skillet pretty easily.  I recommend making the slaw first so it has a chance to set and for the flavors to combine while you make the salmon (or earlier in the day and store in the refrigerator).  I served white rice with the fish & slaw and it all tasted great together.  

Crispy Honey Ginger Salmon (serves 4)
from Half Baked Harvest.

4 salmon filets (skin on)
1 T sesame oil
2/3 cup honey
2 T sambal oelek (red chili condiment - it's usually by the Thai curry pastes)
2 T soy sauce
1 inch piece fresh ginger, grated
2 cloves garlic, chopped
zest and juice of 1 lime

For the slaw:
2 T lime juice
2 T rice vinegar
3 cups of cabbage, shredded (or coleslaw mix)
1/2 cup fresh cilantro, shredded
2 carrots, shredded
1 jalapeno, thinly sliced
pinch of salt

In a small bowl, combine the honey, samba oelek, soy sauce, ginger, garlic, lime zest, and lime juice. Preheat the broiler.  Rub the salmon all over with the sesame oil.  Heat an oven safe skillet over medium high heat.   Pour the sauce in the skillet and allow it to barely boil (simmer) for 2-3 minutes.  Remove from heat and add the salmon, skin side up.  Transfer the skillet to the oven and broil for 2-5 minutes, watching closely until the salmon skin is crisp.

In a medium bowl, combine all the ingredients for the slaw and toss to combine.  


Wednesday, March 29, 2023

Whipped Feta & Roasted Chickpeas (Food from Instagram Part II)


My friend Amy and I send each other Instagram stories or posts or links to recipes with the message "let's make this!" We used to be in the habit of a weekly dinner with our families until life got crazy (crazier?) this year and now it's more like monthly.  This past weekend, I remembered one of those posts and dug it up.  Now, I remember when Instagram was brand new and just people sharing filtered photos - no pushed content, sponsored ads, or complicated algorithms.  I never thought it would be a place for recipe inspiration but most of what I save is food/recipe related.  Inevitably, the recipe & instructions are usually not specific or detailed enough so then I head down the rabbit hole of searching for a better description / methodology and end up right back at food blogs where I started.  The version below is a combination of me reading several different things on the internet.

I read that the chickpeas will get crispiest if they start out really dry (which seems counterintuitive since you're going to toss them in olive oil) and if you remove the skins.  I found that a lot of the skins came off when I dried them and I didn't get too picky about that part.

In the end, I have concluded that I like goat cheese much more than feta and I would have preferred a base like the goat cheese & balsamic blueberry appetizer that I've posted here but everyone else liked it and we ate it all!

For the whipped feta:
6 oz feta
4 oz plain greek yogurt
juice & zest of 1 lemon
1 garlic clove, minced
1/2 tsp oregano
1/4 tsp pepper

Put all ingredients in a blender or food processor and blend until smooth

For the roasted chickpeas:
2 cans garbanzo beans / chickpeas
1 T olive oil
some seasonings - I eyeballed it but used smoked paprika, oregano, and cumin

Rinse the chickpeas and dry them well with a kitchen towel or paper towels.  Put them in a bowl with the olive oil and seasonings and toss to coat.  Spread on a parchment lined baking sheet and bake at 350 degrees for 45 minutes - 1 hour, shaking the pan every 15 minutes or so.

To serve, spread the whipped feta on a plate, top with the chickpeas, and drizzle with olive oil (optional).  We served this with pita chips but pita bread, crackers, crudite etc. would work well too.

Sunday, March 26, 2023

Instant Pot Beef Bourgignon

The girls had a recent day off of school for teacher in-service and I loved finding them being creative instead of looking at screens.  


Now making slime is one of my least favorite "creative" activities (and it's banished to outside) but with one kid getting ready to drive and talking about college, I know our slime days are numbered.  And, it's something they like to do together (and did I mention outside?).  Big is painting a pair of shoes for Middle to wear when we go to Disney World since her own Rapunzel inspired ones are done.

I've been thinking about creativity and how that part of my job is what I miss the most so I'm trying to write a little more here on the blog and on another project so that I can use that part of my brain a little more.  

The creativity I struggle with is coming up with new ideas for dinner . . . I still dread the "what's for dinner" question that I get (most days before breakfast from Little or even the night before).  Part of it is that I feel like my one picky eater doesn't really like most of what the rest of us like to eat and another part of it is that I get in a rut of making the same 5-7 dishes over and over.  Send any new meal suggestions my way!

This winter we've really liked this Beef Bourguignon and other beef stew variations and the instant pot makes it so easy to have very tender braised beef.  I keep forgetting to save the recipe I like so here it is so I can always find it again!


A couple of recipe notes:  I like to buy my own roast and cut it into chunks - the chunks of stew meat that most places sell are tough and not delicious.  I leave my mushrooms large (sometimes halved cremini mushrooms) so that my girls can pick them out.  As always, it's not an "instant" recipe by any stretch but it tastes like you spent longer than an hour on it and a lot of the time is hands off.

Instant Pot Beef Bourgignon (serves 6)
from Creme de la Crumb

1 T vegetable or olive oil
6 pieces of thick cut bacon, roughly chopped
3 lbs beef roast cut into 2 inch chunks
1 cup red wine
2 cups beef broth
1/2 cup tomato sauce
1 beef boullion cube, crushed
1/4 cup flour
1 white or yellow onion, chopped
2 carrots, sliced into 2 inch pieces
1 T minced garlic
2 T fresh thyme, chopped
1 lb baby potatoes
8 oz fresh mushrooms, cleaned and sliced
salt and pepper to taste
fresh parsley to garnish & serve

Set the instant pot to sauté and add the oil and bacon.  Cook until crisp, stirring frequently with a slotted spoon.  Remove to a paper towel lined plate and set aside.

Add the beef and sear 3-4 minutes using tongs to rotate the pieces so all sides are browned.

Add red wine to the pot and scrape up any cooked beef or bacon bits.  Simmer and reduce for about 5 minutes.  Gradually add the beef broth, tomato sauce, and boullion.  Whisk in the flour, a little at a time.  Stir in bacon, carrots, onion, garlic, thyme, mushrooms, and potatoes.  Season with a little salt and pepper.  

Put the lid on and set the instant pot to pressure cook for 45 minutes.  After that, do a natural release for 10 minutes and then a manual release, switching the valve to vent.  When you can safely remove the lid, change the setting to saute and let the sauce thicken for 5-10 minutes.  Give it a good stir, taste it, and season with more salt and pepper if you want.  Serve with fresh chopped parsley.  My girls like a good crusty bread on the side as well!

Monday, March 13, 2023

Classics reimagined for new (sports) seasons

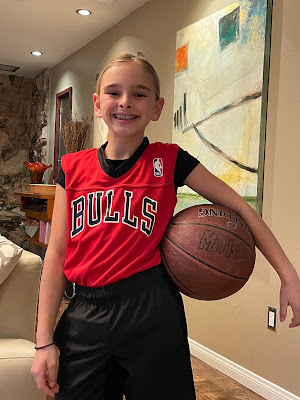
Even thought it has felt like a long, wet California winter, these days.we mark the season more with sports seasons than with weather.  Big played her first year of high school varsity basketball, Middle played her first year of middle school basketball, and now the younger two are playing another season of basketball on co-ed teams at the YMCA.  We spend 5 nights a week at the Y between practice & games for two teams so that has impacted the way I meal plan.  One night, I need something that's ready almost as soon as we get home from practice, other nights, I need something everything can eat at different times, and still other nights, we eat early before we go to basketball.  That's not to say that we don't grab Chick-Fil-A once in awhile or order a pizza, but I try really hard to save eating out for a treat on the weekends.


One of my go-to weeknight meals is a pot of green soup with grilled cheese sandwiches.  Still, almost any time I ask my husband what he wants for dinner, the answer is "green soup."  The girls *may* be a little tired of it so I've switched up my recipe to a new version that we all like.  I usually make a big batch of grilled cheese to go with it because while green soup is delicious, high in nutrients, and low in calories, I don't want to feed my kids again before bedtime so they need something more to go with it.  In addition to getting a little tired of my old green soup, Big informed me that she's "never liked grilled cheese" (can any parents of teenagers relate to this sort of announcement?). So, now I make baked turkey & cheese sliders on Hawaiian rolls.  Same concept - warm sandwich that can be made in the oven with minimal hands on time.

The great thing about these soups & sandwiches is that most of the ingredients I have on hand, I don't need a recipe anymore, and it comes together fast.  Below you'll find the recipes (or concept) for the "new" green soup and "new" sandwiches but if you want to see the originals as well, here are the links:

Green Soup

How to make Grilled Cheese in the oven in a big batch


Creamy Kale & Potato Soup (4-6 servings)

Note:  The main difference between this green soup and the other one is the use of potatoes instead of rice as the starch and the addition of some dairy - you can substitute non-dairy milk / creams if that's an issue for you or just use more broth and leave it out altogether.

1 T olive oil

1 onion, diced

2 medium potatoes, peeled and cubed

3 1/2 cups vegetable stock / broth

2 cloves of garlic, finely chopped

1 cup milk

2 large handfuls of kale (stems removed and chopped)

black pepper

cooked bacon (optional)

Heat the olive oil in a big pot and add the onion and potatoes.  Cook for 10 minutes or so until softened.  Add the garlic and saute for another minute or two.  Add the broth and scrape up anything on the bottom of the pot.  Let it simmer for 10-15minutes or until the potato is soft.  Add the kale and stir and cook until it's all wilted (3-5 minutes).  Using an immersion blender, blend it until smooth (or you can transfer it to a blender and then back to the pot).  Add the milk, season with pepper to taste, and warm it back up.  Serve with cooked bacon as a garnish.

Turkey & Cheese Sliders


In a small saucepan, melt 1/2 cup of butter and add 1/2 T of Worcestershire and 1/2 T of dijon mustard.  Set aside.

Cut an entire bag of Hawaiian rolls in half lengthwise and remove the top.  Spread with yellow mustard.  Top with deli turkey and sliced cheese.  Replace the top of the bread.  Brush over the melted butter mixture and sprinkle with Everything Bagel seasoning.  Bake in a 350 degree oven for 10-15 minutes or until toasted and melty.

Tuesday, October 18, 2022

Happy Birthday Dessert!

It's October and my husband's birthday month!  I haven't posted in awhile and right now I'm not working for the first time (other than maternity leave) my entire adult life.  While it's a little strange to not be in a classroom, these days are so busy for our family and I'm grateful to be around for it all.  As of right now, the girls are doing cross-country, band, gymnastics, Little Ladies Etiquette class, basketball, tennis, ASB and Big has an exciting new part-time job.  We spend a lot of time in the car but it's a great time to catch up and hear what's going on at school & with their activities.

Here are a few photos from the past few months:


From my previous posts, you know that my husband has great birthday dessert ideas - this year he said "something lemon or blueberry or both" and I found and modified a recipe online that turned out awesome.  We all loved it and I'll be making it again for friends.


Lemon Blueberry Cheesecake
from Gonna Want Seconds blog

2 cups graham cracker crumbs
1/2 cup unsalted butter, melted
16 oz cream cheese (room temperature)
1/4 cup granulated sugar
2 eggs
1 tsp. vanilla extract
1 cup marshmallow fluff
1 cup blueberries
1/2 - 1 cup lemon curd

Preheat oven to 350 degrees.  Spray a 9 inch springform pan with nonstick baking spray and set aside.  

Combine the graham cracker crumbs with the butter and stir until combined.  Press the mixture into the bottom of the springform pan using an empty measuring cup to press it down evenly.  Bake the crust for 10 minutes.  Remove to a wire rack while keeping the oven at 350 degrees.

Place the cream cheese and sugar in the bowl of a stand mixer.  Beat until smooth and creamy.  Beat in the eggs and vanilla extract.  When it is all well-combined, add marshmallow fluff and beat until it's combined.

Pour the filling over the crust.  Sprinkle the blueberries on top and press them lightly with the back of a spoon to sink them into the filling

Bake for 20 minutes.  After the 20 minutes are up, without opening the oven, reduce the heat to 200 degrees and bake for an additional 30 minutes.  Once it's all finished baking, turn the oven off, but leave the cheesecake inside for 10 minutes.  Remove and allow to come to room temperature.

Cover it and place it in the refrigerator for at least 3 hours.

When ready to serve, pour the lemon curd over the top and spread it evenly before slicing.

Tuesday, July 19, 2022

Baked Oatmeal (Food from Instagram Part I)


On Mother's Day, my daughters wanted to make a special breakfast for me but we weren't going to the grocery store and I was trying to think of what I wanted with what we had in the house.  I remembered this baked oatmeal that I had recently seen on Instagram and it was delicious!  You've probably seen the post or the reel but here is the full recipe and the proof that it's great in real life!  We ended up making it a few more times in the weeks that followed.  

The fruit & toppings can be easily adjusted and it's a "flexible" recipe in terms of portions but I like that it doesn't have added sugar but satisfies the sweet tooth and contains whole grains, fiber & protein.  You'll see below how adaptable it is . . . omit the chia seeds if you don't have them!

One Pan Baked Oatmeal (4 servings)

1/2 T coconut oil (or butter)

1 banana

1 cup old fashioned oatmeal

Almond milk (or soy or regular milk)

3 tsp. chia seeds (optional)

frozen or fresh berries

shredded coconut

sliced almonds

optional:  maple syrup, agave or brown sugar

Preheat oven to 350 degrees.  In a medium baking dish, brush the bottom with coconut oil (or butter).  Mash a banana all over the bottom of the pan.  Sprinkle with 1 cup oatmeal. Pour in enough almond, soy or cow's milk to just cover the oatmeal.  Sprinkle with chia seeds.  Whisk the oatmeal, milk and chia with a fork to combine.  Top with frozen or fresh berries, some chopped nuts and coconut and bake for 25 minutes.  If desired, sweeten with maple syrup, agave, or brown sugar.

"Air Fried" Chicken Tenders

Quick confession - I do not have an air fryer.  Although I've been tempted by rave review from friends and online recipes, I don't have room in my kitchen for more appliances.  Essentially, an air fryer is a smaller convection oven, so I've been experimenting with making some "air fried" recipes in my . . . convection oven.  I was looking for a new way to make some chicken tenders at home and stumbled across this on Pinterest.  My girls really liked the chicken tenders and I'm happy with the overall method and recipe.  I've been messing around with a cauliflower version (think: buffalo cauliflower appetizer) and I'll post an update when I have that one down.

My previous posts about these chicken tenders are still the family favorite (and check out those dipping sauces!) but what tips the scales towards this recipe is how simple it is.  Instead of doing the flour, egg wash, and bread crumbs, you marinate the chicken first in ranch dressing and then use a complete baking mix (which has both egg & flour in it).  I was trying to avoid the multiple dipping layers (and the trip to the store when you don't have panko or other breadcrumbs).  It's more delicious if you add some spices to the baking mix (try paprika + salt + ground pepper or Italian seasoning + parmesan cheese).

Tips:  To simulate the air fryer, you need high heat, a convection setting, and the olive oil (don't skimp or skip this step!)

I usually marinate the tenders in the ranch for a little while but it's not that necessary.  You can spruce up the baking mix by spices like I mentioned above.

"Air Fried" Chicken Tenders (4-6 servings)

1 cup prepared ranch dressing (like Hidden Valley)

1 cup Bisquick or other complete baking mix

1.5 pounds chicken tenders

salt, pepper, seasoning

Olive oil

For serving:  bottled buffalo sauce, bbq sauce, or bleu cheese dressing 

Heat oven to 450-475 degrees.  Line a rimmed baking sheet or 9x13 pan with foil.  In a bowl or large ziplock bag, combine the ranch dressing and chicken tenders, making sure they are completely coated with the ranch.  Allow to marinate for 15-30 minutes (or while the oven preheats).  

In a plate, dish or large ziplock bag, add the Bisquick (or baking mix) and add some salt, pepper, and other seasonings (like paprika or seasoning salt).  Take the ranch-marinated chicken tenders and coat them with the baking mix.  

On the baking sheet or foil rimmed baking pan, drizzle it with olive oil and use spread it all over (I use a brush to make sure it's all coated with the olive oil).  Place the chicken tenders flat in the olive oil coated baking dish or pan, making sure they don't overlap or touch each other.  

Bake for 8-10minutes or until the bottom of the chicken is golden brown then carefully & gently flip the chicken over.  Bake for 9-10 more minutes or until the chicken is slightly crispy and golden brown.

Serve with some dipping sauces & enjoy!